Highlights #
A managed advertiser is an advertiser, whose account you create. This kind of advertiser doesn’t have his personal dashboard. You make any changes to the campaign.
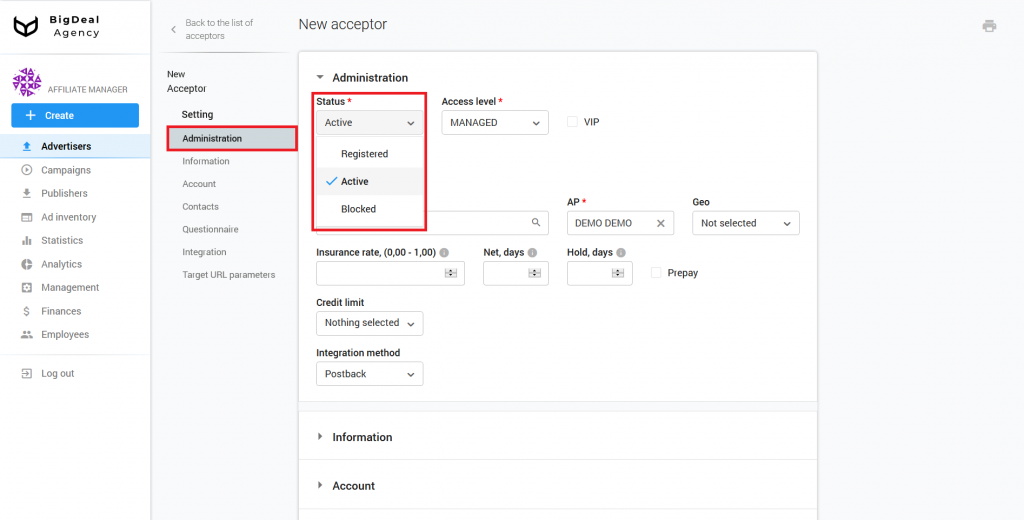
Block Administration #
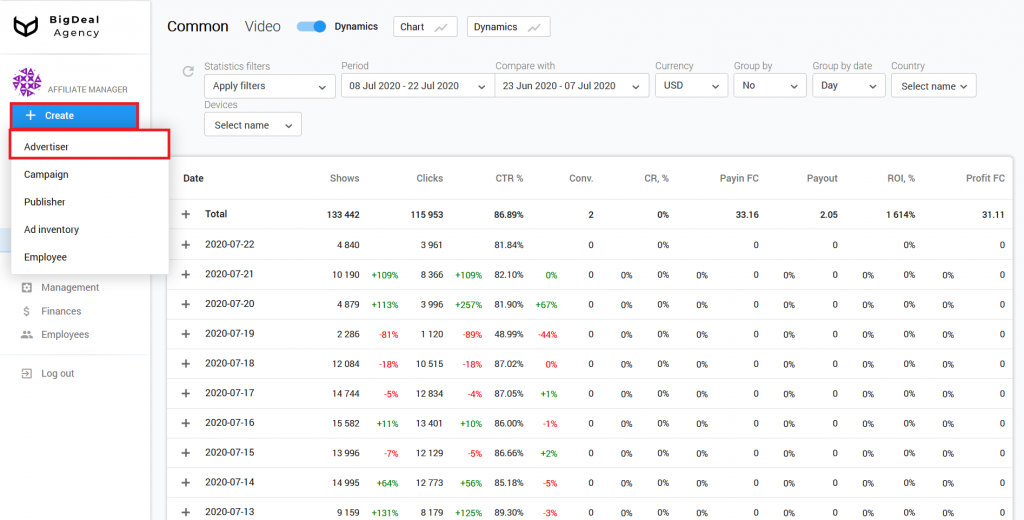
Let’s create a managed advertiser. Visit the Salematics platform and click on the Create – Advertiser button.
You will see the settings page. Select Active from the Status drop-down list. Other statuses are used for self-service advertisers. Therefore, we will not consider them in this article.
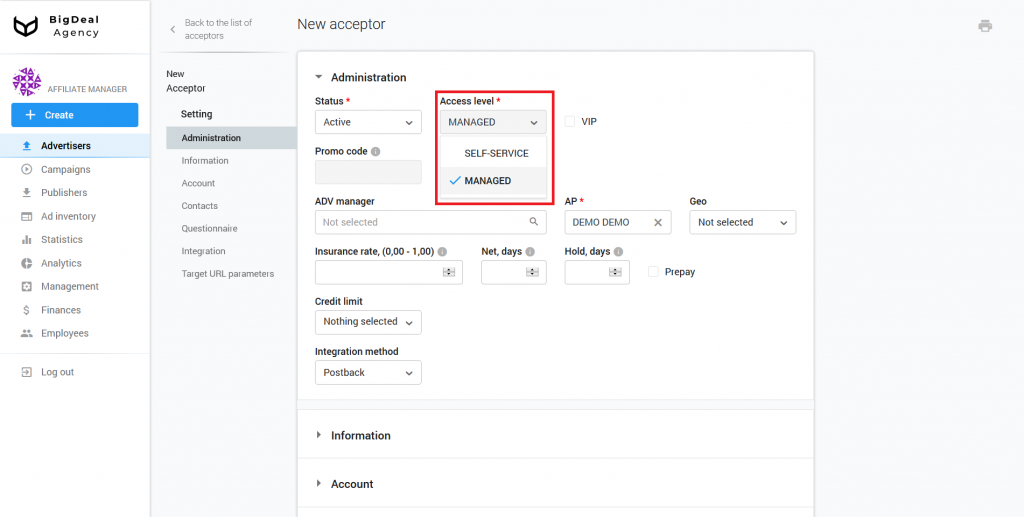
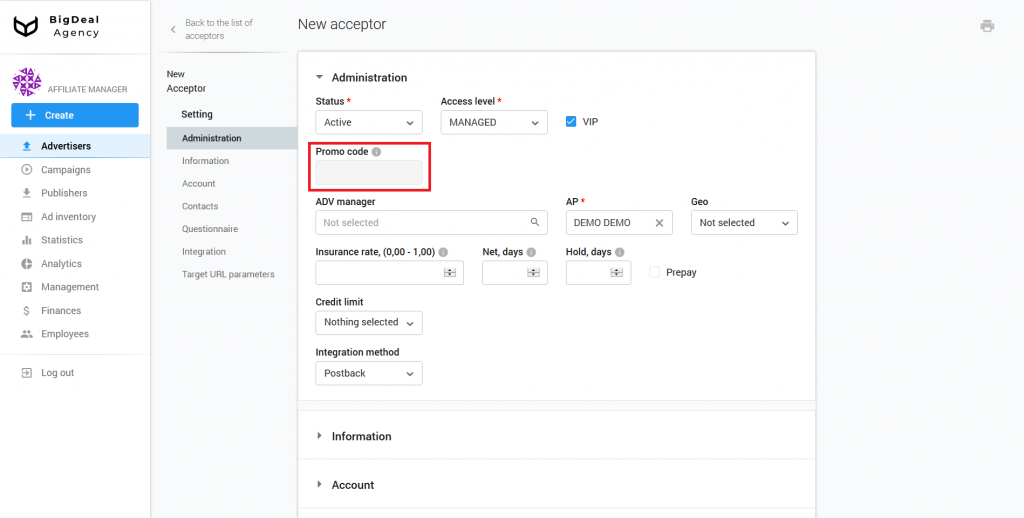
Specify MANAGED in the Access Level field.
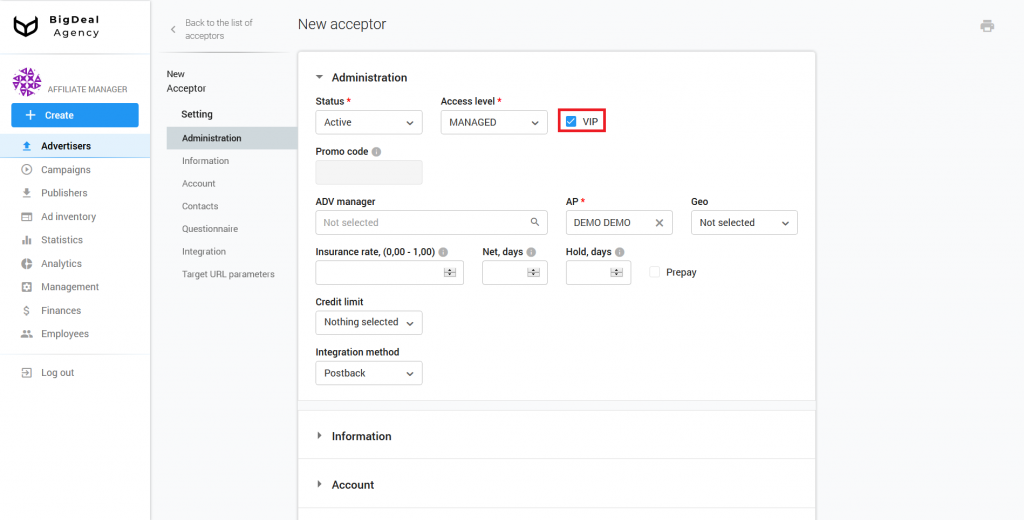
The VIP option is entended for the quick filtration of advertisers. You can tick the box at will because it will not affect campaigns.
Managed advertisers can’t use promotional codes when registering on the affiliate program website, so the field Promo code remains inactive.
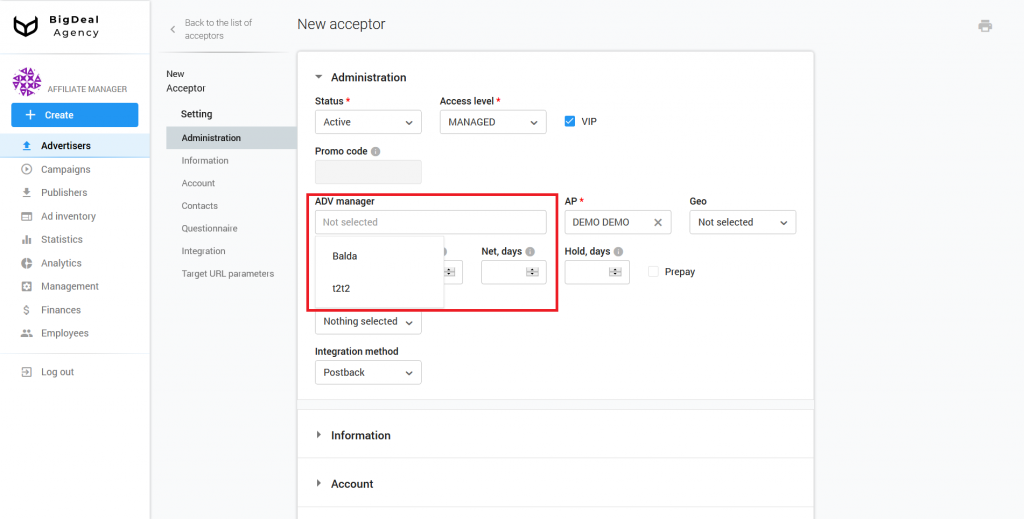
If you create an advertiser profile, select your account from the Adv manager list.
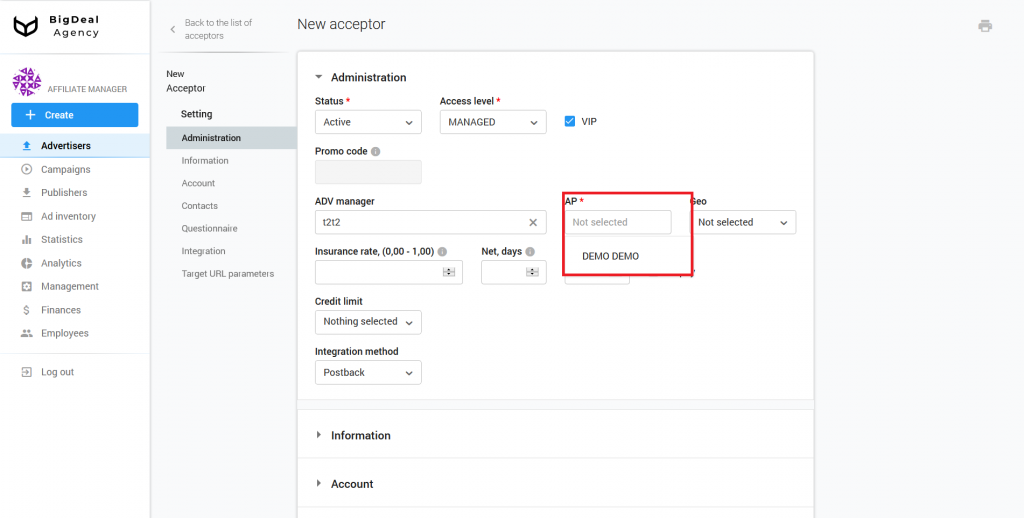
For example, let’s select the DEMO DEMO affiliate program. Tick it in the corresponding drop-down list.
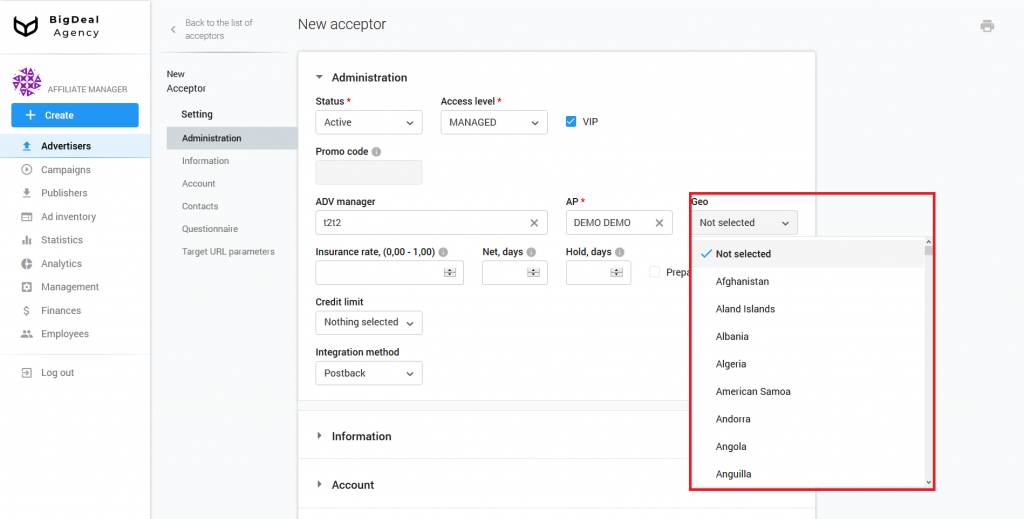
Geo is optional. You can select the advertiser’s country of origin. In this case, another manager will receive more information about the client.
Insurance Rate displays the percentage of the advertiser’s payment that is deducted as insurance. It is necessary when the advertiser informs you of income that exceeds the real one.
For example, you installed an advertiser’s application a hundred times. The advertiser sent you a confirmation via postback and notified that he would pay $ 1 for each installation. Later, the advertiser refused to pay for 10% of installations, because they did not match the quality. This situation is called deduction. If such a thing happens regularly, set insurance at 10%.
The Payin FC column in the Statistics section shows campaign revenue. It can be calculated using the following formula: Payin FC = Payin * (1 – Insurance).
Move your mouse cursor over the value in the Payin FC column to see Payin without insurance. The tooltip will display:
- Self payin. Here you can check earnings from campaigns that receive direct traffic.
- Pending payin. In this column, you can see earnings from conversions, not confirmed by advertisers.
- Arbitrage payin. This column shows earnings from the campaigns on the showcase.
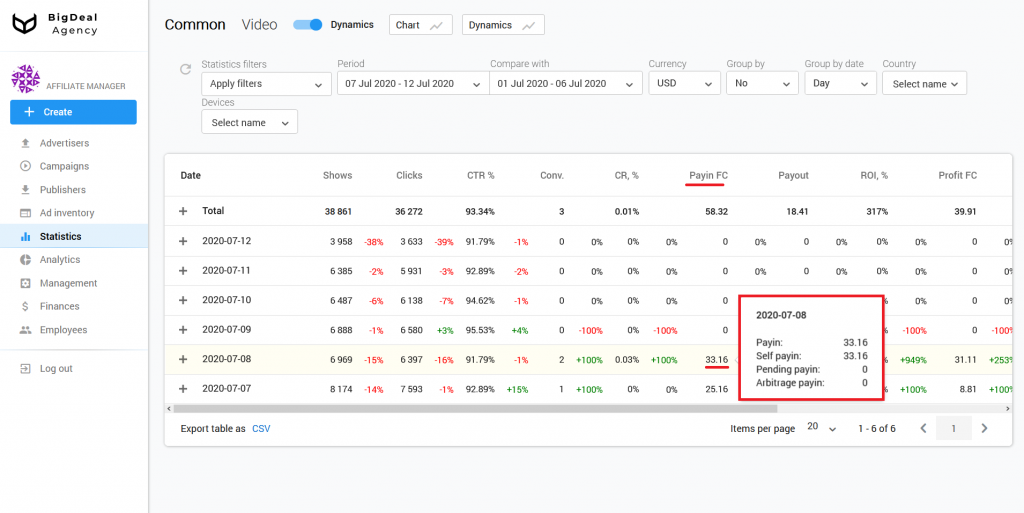
If the advertiser continues to refuse 10% of the traffic, you will not have to recalculate the payments for publishers. Salematics uses Payin FC to calculate the payments.
When the advertiser does not write off, then these funds remain in your account. Keep in mind that the value Payin contains the income from the campaign.
Please note: type insurance as a percent proportion. For example, if insurance equals 10%, indicate a value 0.1.

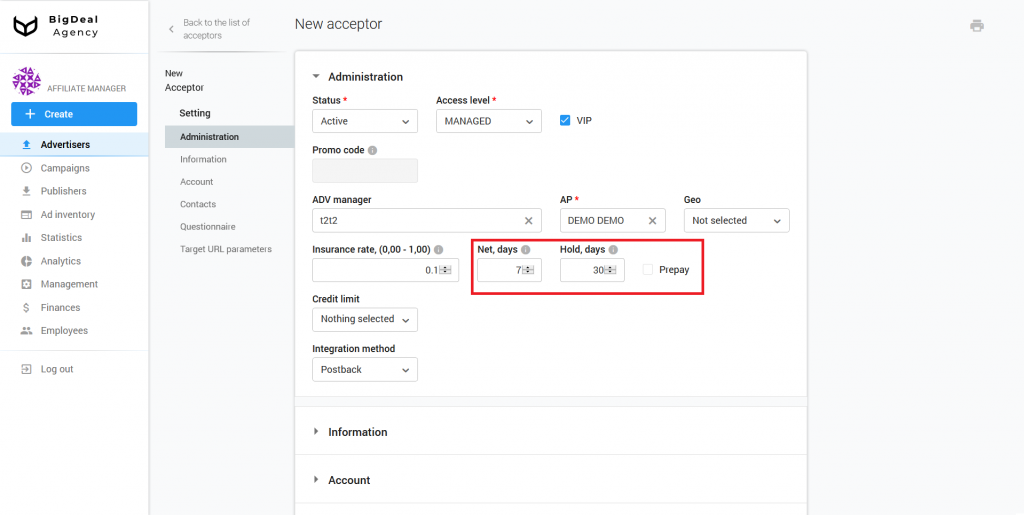
The following settings are obligatory to set:
- Net is the frequency of payments from the advertiser. For example, if he pays once a week, specify 7 in the field. If twice a month — 15, once a month — 30, and so on. In the case of prepaid work, leave the column blank, and tick the Prepay box.
- Hold is the period for which the amount of payment from the advertiser is reserved. For example, if the advertiser hold is thirty days, enter the numeric value 30 in the corresponding line. If there is a prepaid payment, the situation will be similar to Net.
- Prepay is an amount that the advertiser pays ahead before receiving traffic. Tick the box if he pays ahead.
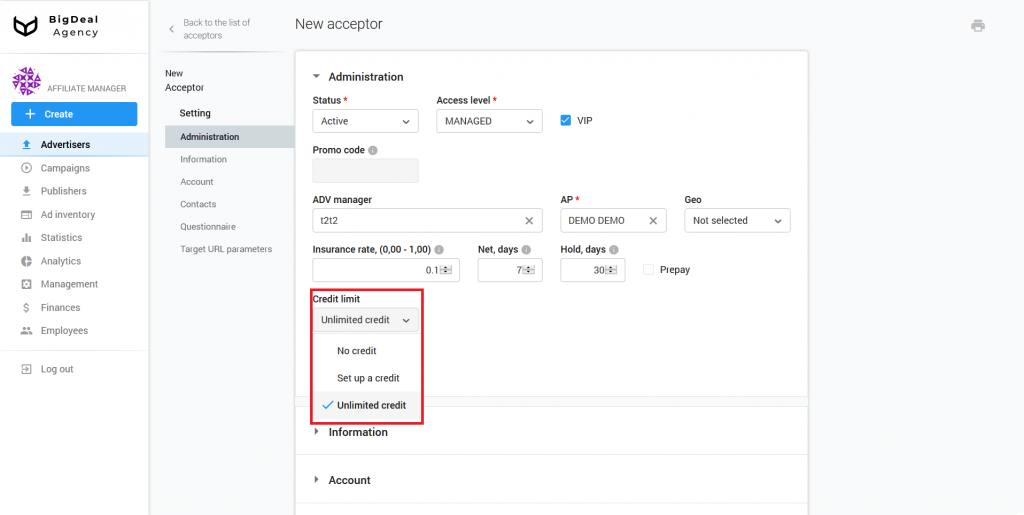
Select Unlimited credit in the drop-down list Credit limit. Choose this option when the advertiser pays on the postpay model. First, you send him traffic, and then he pays for it.
No credit and Set up a credit options are used to create an advertiser self-service account.
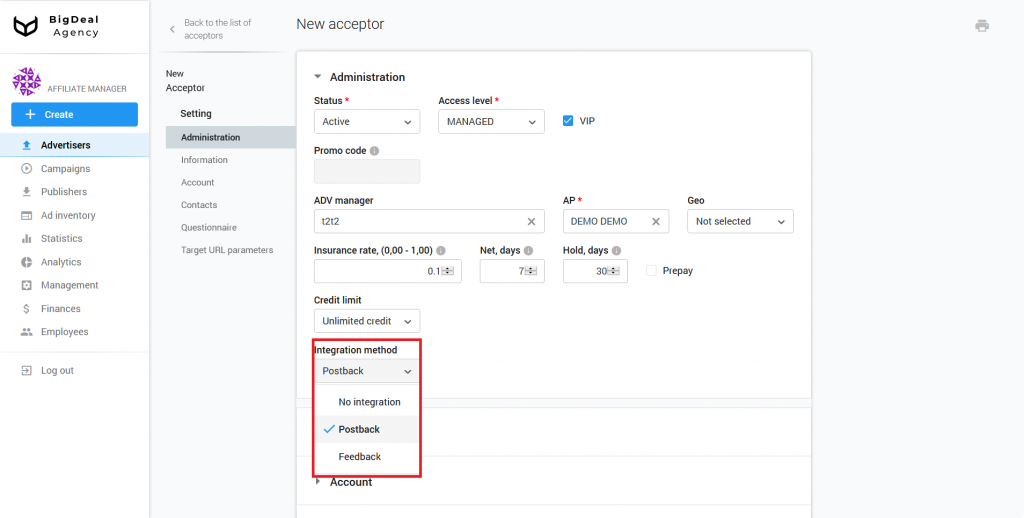
Coordinate Method Integration with the advertiser. The integration method is a way for the advertiser to send you statistics. The system offers three integration options:
- No integration. In this case, the advertiser does not provide you with statistics. Use this option if you work with CPC and CPM advertisers.
- Postback. Choose it when the advertiser can inform you of conversions via a postback.
- Feedback. Statistics are transmitted via API, JSON, or XML-feed.
We will select the Postback method. Read more about this in the article Integrate DSP MANAGED advertiser (coming soon).
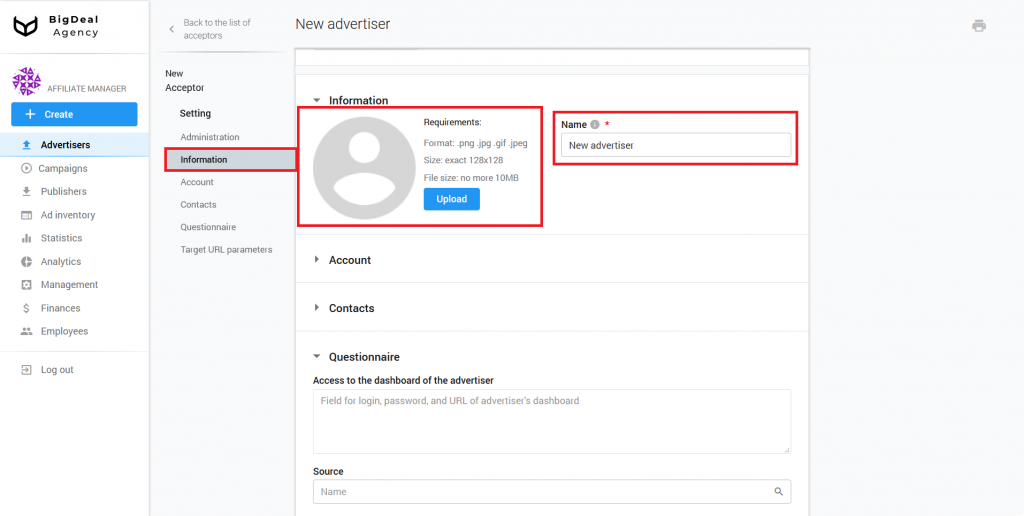
Block Information #
Type the advertiser’s name in the corresponding field.
You can also upload an image for the account.
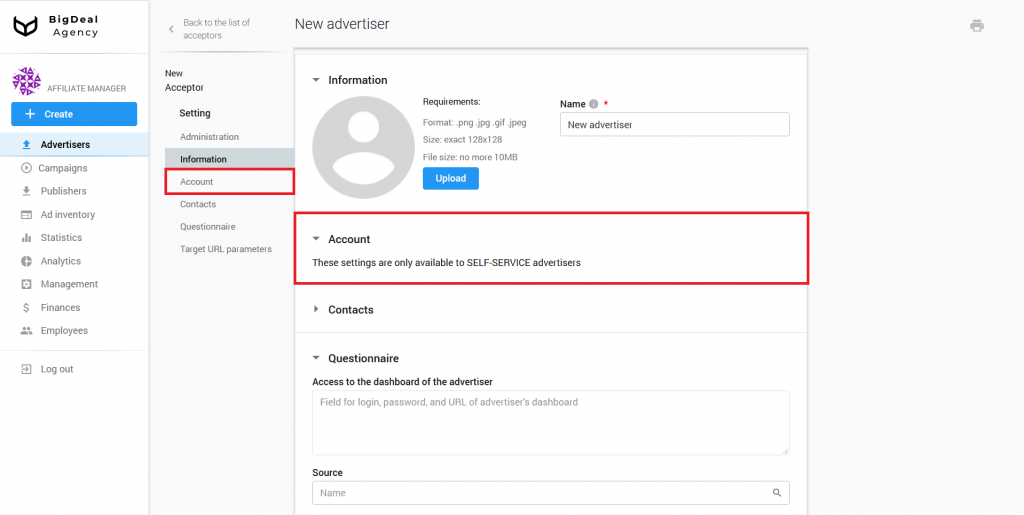
Block Account #
If you create a profile of a managed advertiser, this block is not available.
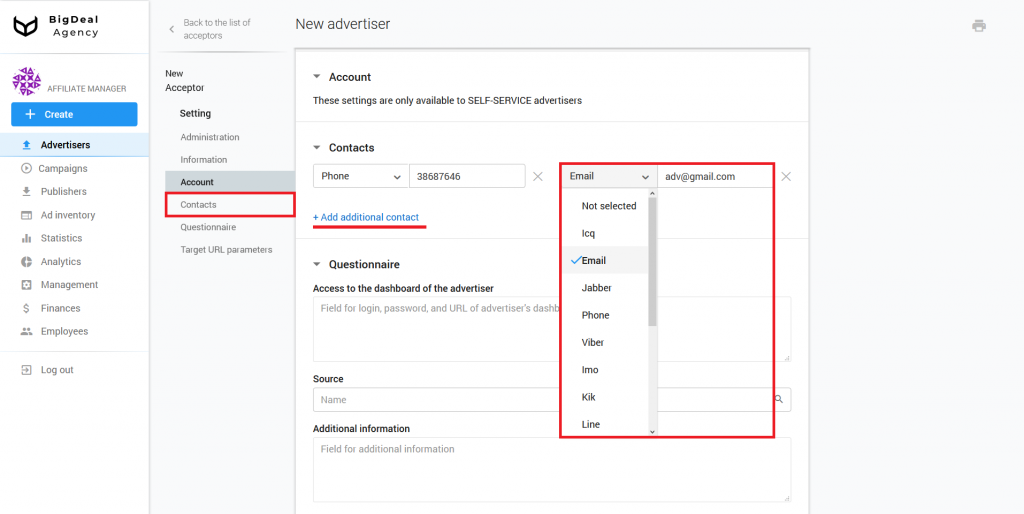
Block Contacts #
Select one or a few messengers / other means of communication offered in the admin panel to keep in touch with the advertiser in the future.
Block Questionnaire #
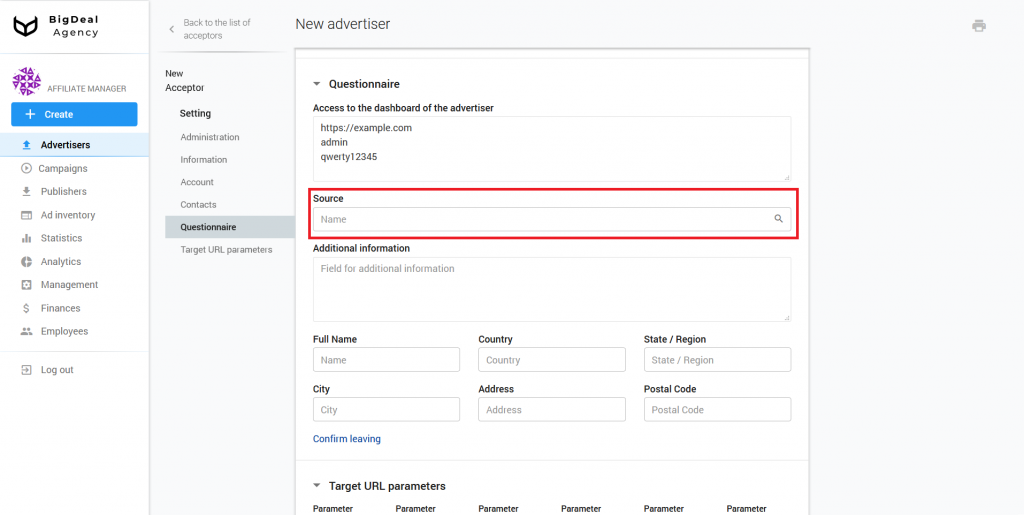
Place here a link to the advertising dashboard, login or email address, and password in the Access to the dashboard of the advertiser field. This information will come in handy in case of an emergency, and your employee will be able to log in to the advertiser dashboard, make changes, and see the necessary information.
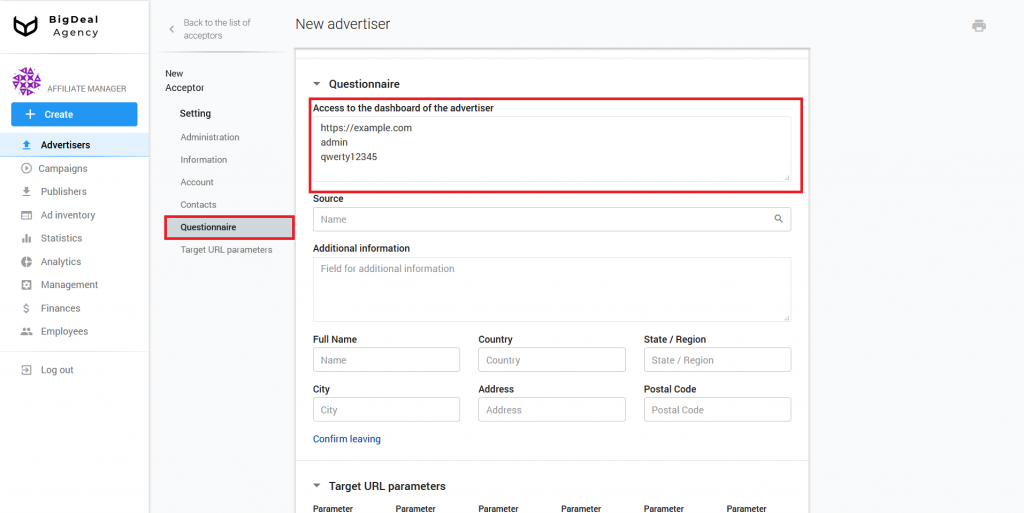
Skip the Source drop-down list. The name of the source should be specified for self-service advertisers.
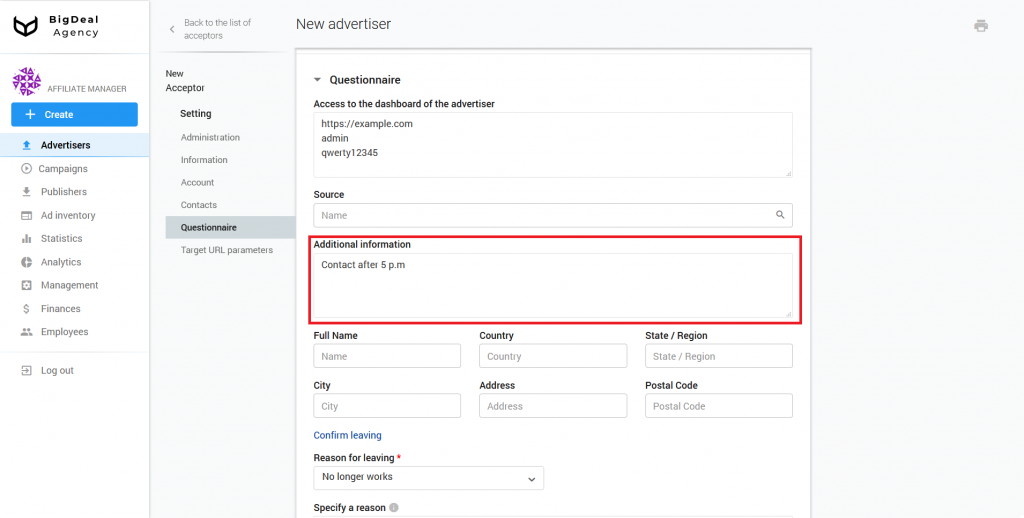
Make any entries that may be useful when working with the advertiser in the Additional Information field. For example, it can be his characteristics or preferred time for communication.
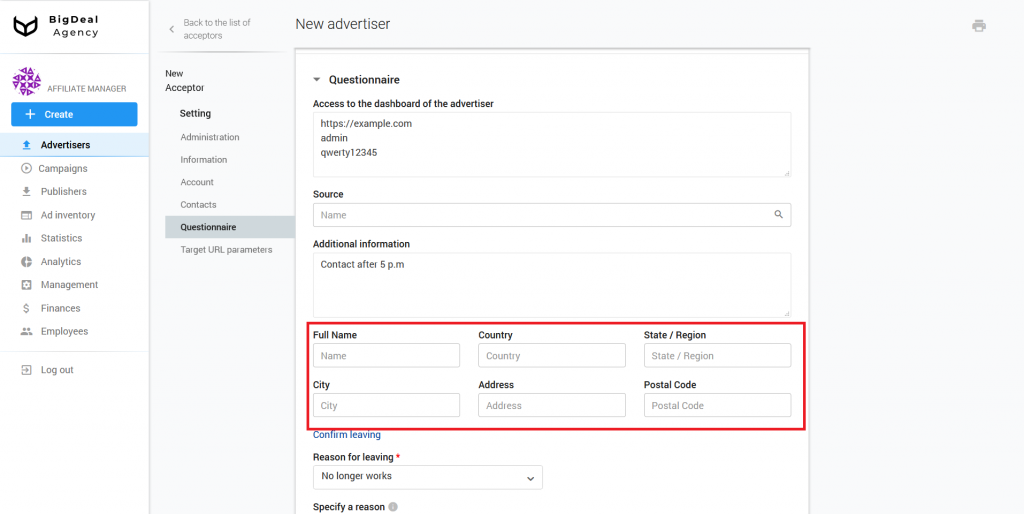
You might enter the real name and full address of the advertiser in the corresponding lines.
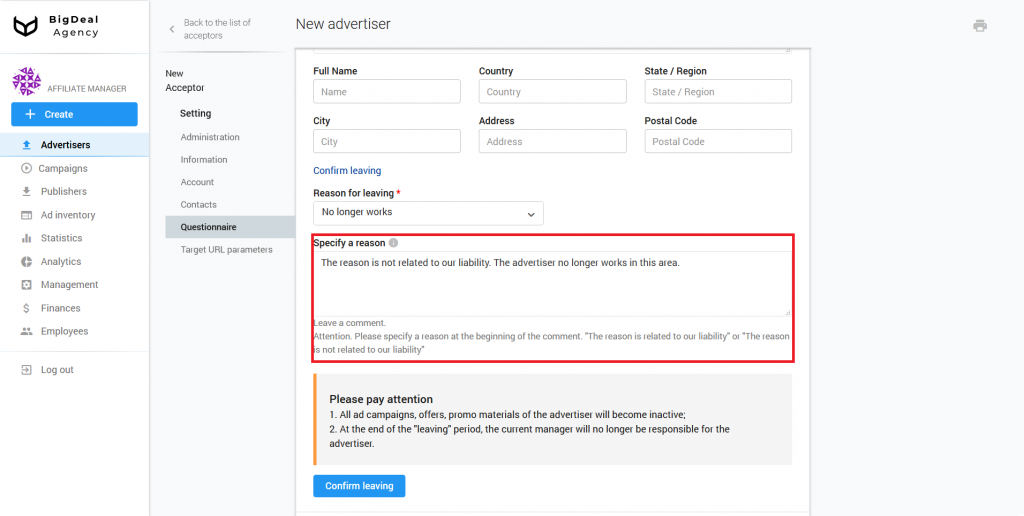
If an advertiser decided to stop collaboration, then you need to confirm his leaving. Click on Confirm leaving and select the reason from the drop-down list.
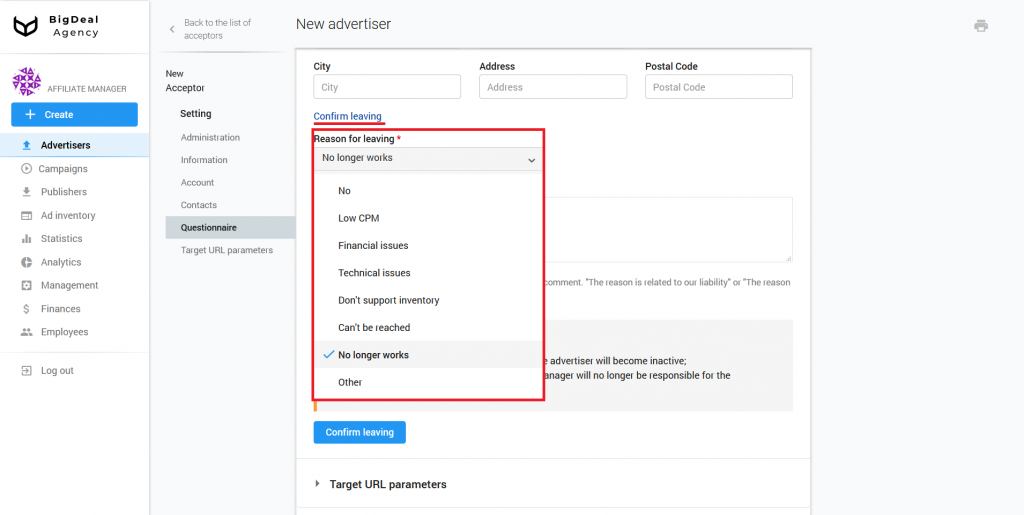
Describe in detail the circumstances of leaving in a relevant field. Specify the reason, if it was not on the list.
Please note: specify who stopped collaboration. Copy and paste The reason is related to our liability or The reason is not related to our liability. Otherwise, the platform will not save the information.
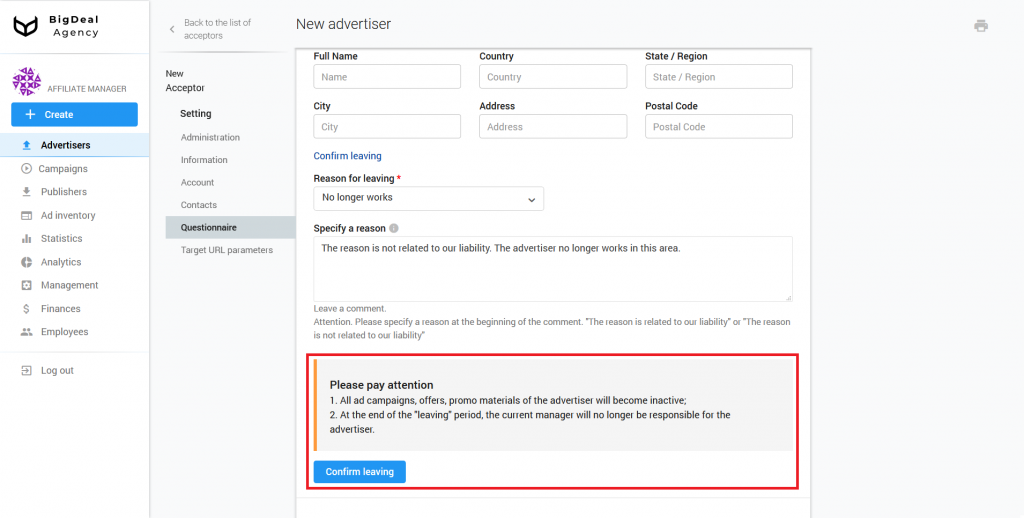
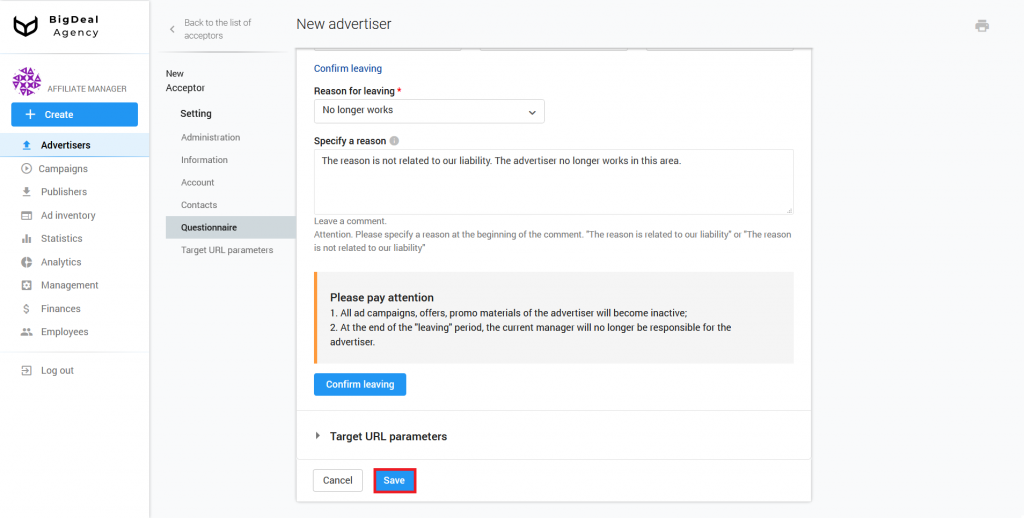
As soon as you click the Confirm leaving button all ad campaigns, offers, promo materials of the advertiser will become inactive. At the end of the N-days, the current manager will no longer be responsible for the advertiser. Another employee has the right to get in touch with this advertiser and try to return him.
When you have entered all the required information, click Save. A managed advertiser’s account will appear on the Salematics platform.
If you want to receive statistics on the performance of running campaigns from the advertiser, integrate him with the admin panel. Read more about this in the article Integrate MANAGED Advertiser via Postback URL и Integrate DSP MANAGED advertiser (coming soon).
If you are going to launch a CPM campaign, go straight to creating it. In most cases, you do not need integration. The process of creating a campaign is similar to this one that used for Creation of CPA Campaign. The only difference is the choice of strategy.
Let’s summarize the material:
- A managed advertiser doesn’t have access to his personal account. You make any changes to the campaign. A manager creates the account of such an advertiser on the platform.
- You need to enter information in 4 sections to create an advertiser. The required fields are marked with a red asterisk.
- Do not forget to specify the advertiser’s contact details, as well as logins and passwords from his dashboard.
