In the article below, we will take a closer look at the automated rules setup in the campaigns.
Highlights #
As soon as the advertising campaign is launched, the responsible manager should regularly optimize it and check its statistics.
The block White and Blacklists will help in the analysis and optimization. If you have a small number of traffic sources, you will need only this tool.
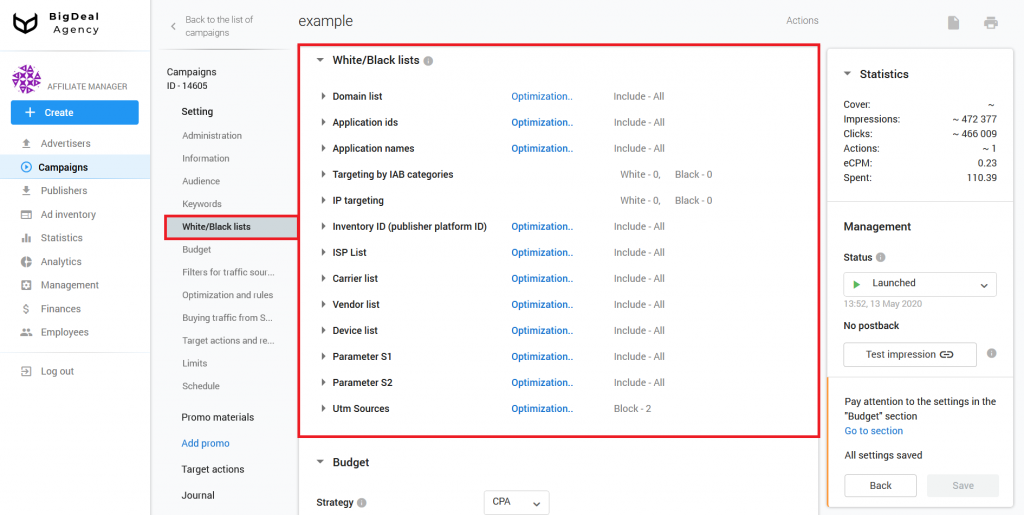
When you work with a large number of publishers whose traffic is constantly changing, manual optimization is not enough. You will not have time to block unprofitable sources of traffic, because they will appear and disappear faster than you can add them in Black or Whitelists.
To solve this problem, you will need the block Optimization and rules.
Block Optimization and rules #
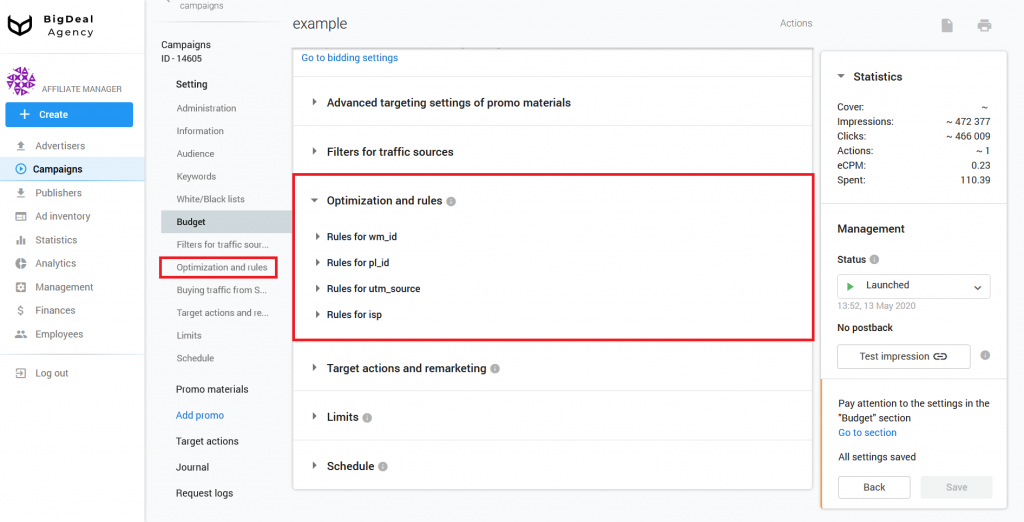
You can find the Optimization and Rules block in the campaign settings.
It contains conditions for three types of traffic sources.
- Rules for wm_id are set at the publisher level. Here you can add a publisher account to Black/ Whitelists. It is the strictest rule. If you add the publisher to the Blacklist, all his existing and future ad inventories will be blocked. The reverse is true for Whitelist.
- Rules for pl_id are set at the ad inventory level. You add individual publisher ad inventories to Black/Whitelists. This is not such a strict rule. If you add an ad inventory to the Blacklist, all traffic from it will be blocked. When the publisher places this ad inventory on other sites, the campaign also will not receive traffic.
- Rules for utm_source are set at the site level. In this case, it is possible to add individual publisher sites to the Black/ Whitelist. It is a flexible and soft rule. We recommend using it in most cases. The rule allows you to block or allow traffic reception only from certain UTM Source. At the same time, if the publisher creates a new ad inventory or places an ad code on another site, the campaign will still receive traffic, because UTM Source will change.
The process of creating rules for wm_id, pl_id, and utm_source is the same. Let’s look at how to set them using the UTM Source example.
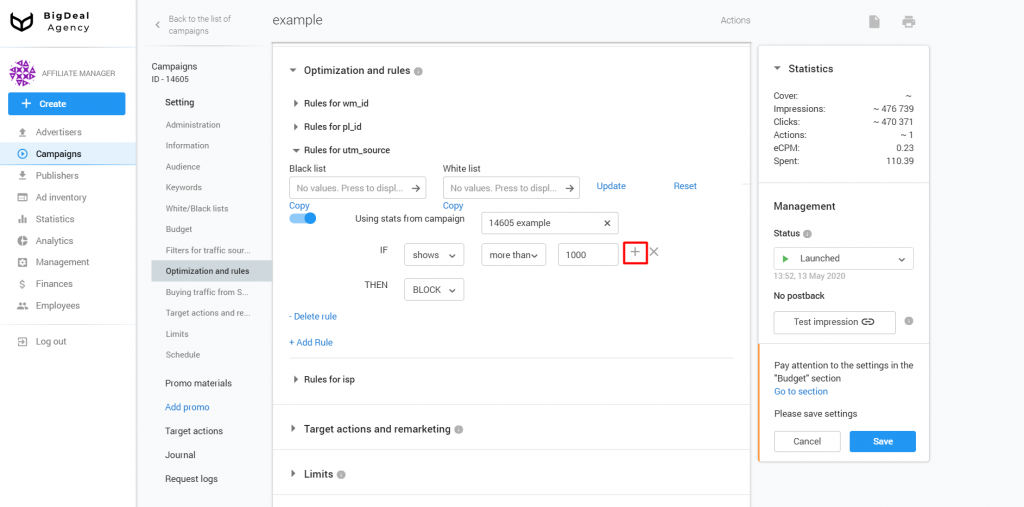
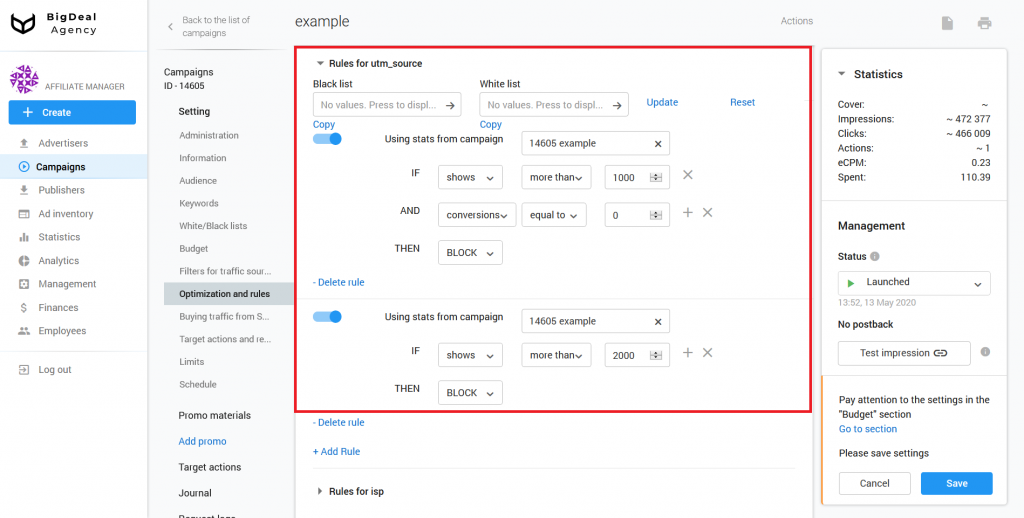
You can find the fields for Black/Whitelists in the rules block. They will contain a UTM Source that meets the requirements that you set.
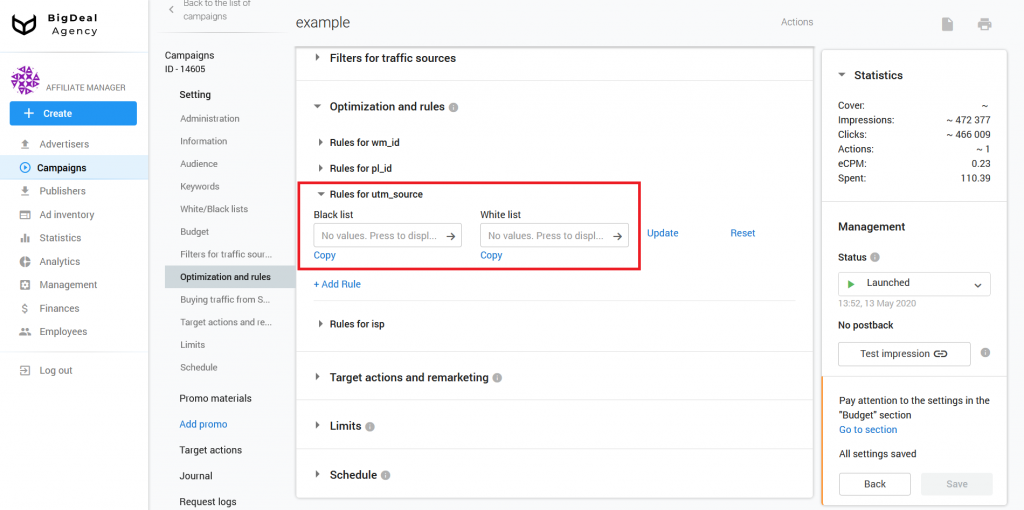
Click on the + Add rule link to create a condition.

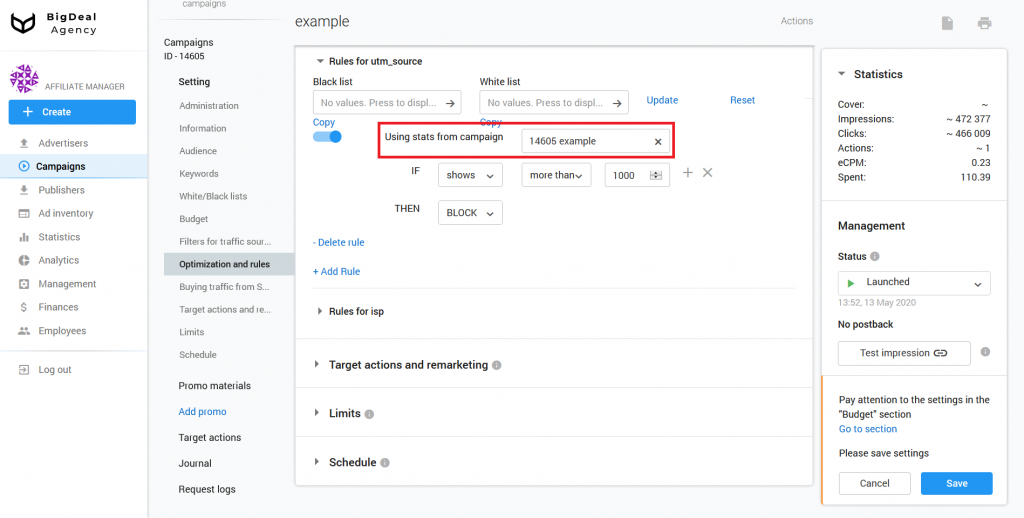
You will see the rule constructor.
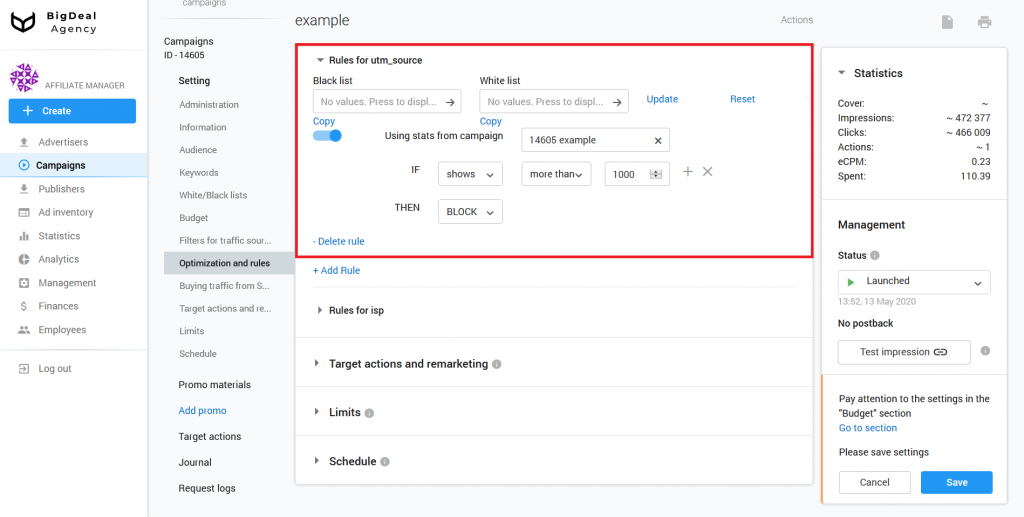
Specify the ID of another campaign in the Using stat from campaign field. The functionality will be useful when you are going to use the statistics of a specific campaign to set the rules in this campaign. For example, you have a campaign A. It is active. You want to show a campaign B only to those UTM Sources that gave conversions for the campaign A. And vice versa, block all UTM Source for campaign B that didn’t give conversions for the campaign A.
If you leave the field blank, the rules will be applied to the traffic coming to the campaign that you are currently setting up.
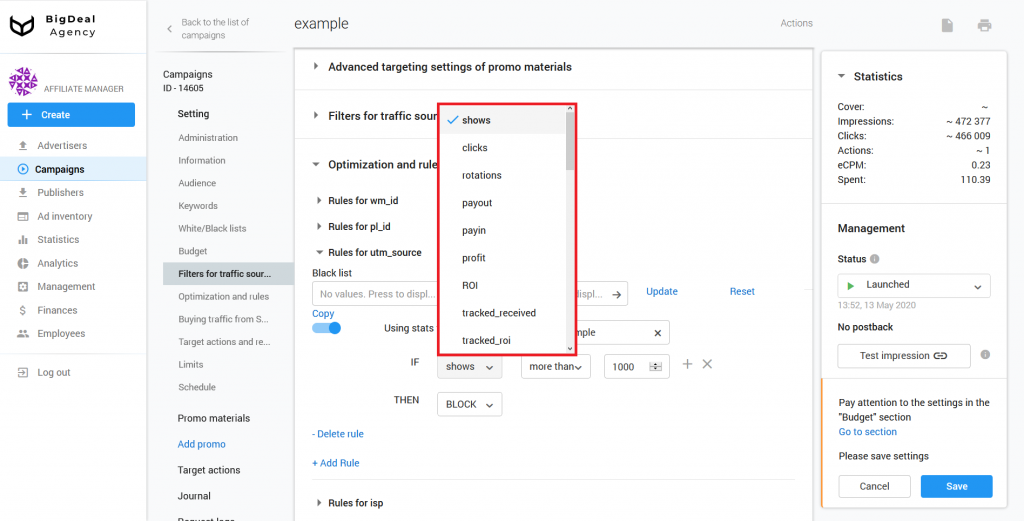
Select the indicator that will be checked by the rule in the first drop-down list after IF. The platform has three groups of rules for working with traffic.
Conditions for working with direct traffic
Values represent the sum of data received from the pre-landing page and own impressions:
- Shows is the number of impressions of the campaign.
- Clicks is the number of clicks made within the campaign.
- Payout is the total amount of payments for the traffic used to display the campaign.
- Payin is the total amount of earnings for a campaign impression. In other words, it is how much the advertiser paid you.
- Profit is the difference between payout and payin.
- ROI is the return on investment ratio. It can be calculated using the following formula (payin — payout) / payout. The platform shows ROI in fractions of a percent. For example, 0.4 or 1.4.
- Tracked_received is the amount the advertiser sends in postback for CPM campaigns. You need to send the total conversion income to the postback. This is the advertiser’s earnings from visitors attracted by you.
- Tracked_roi is the return on investment ratio for a CPM campaign with the configured postback. It can be calculated using the following formula (payin — payout) / payout. Payin is the total revenue from all conversions. The platform shows Tracked_roi in fractions of a percent. For example, 0.4 or 1.4.
- Conversions is the number of conversions. You’ll see data if the advertiser is integrated and passes information about conversions.
- CTR is the ratio of clicks to impressions. It can be calculated using the following formula: clicks/shows. The indicator is irrelevant for promotional materials such as directlink and pop ads. The exception is the use of the HTML pre-landing page. The platform shows CTR in fractions of a percent. For example, 0.4 or 1.4.
- CR is the conversion rate. It can be calculated using the following formula: conversions/shows. It applies only to integrated advertisers. The platform shows Tracked_roi in fractions of a percent. For example, 0.4 or 1.4.
- Inecpm is an effective cost per mille. It can be calculated using the following formula: payin / shows / 1000.
Conditions for working with arbitrage traffic
Values represent the sum of data received from the arbitrage pre-landing page (showcase):
- Arbitrage_shows is the number of times the campaign was shown.
- Arbitrage_clicks is the number of clicks within the campaign.
- Arbitrage_ paid is the amount you paid for arbitrage impressions or clicks. It is the publisher’s share for arbitration advertising.
- Arbitrage_received is the amount the advertiser sends in postback for CPM campaigns. You need to send the total conversion income to the postback. This is the advertiser’s earnings from visitors attracted by you.
- Arbitrage_profit is the difference between payout and payin.
- Arbitrage_roi is a return on investment ratio. It can be calculated using the following formula (payin — payout) / payout. The platform shows ROI in fractions of a percent. For example, 0.4 or 1.4.
- Arbitrage_conversions is the number of conversions. You’ll see data if the advertiser is integrated and passes conversions.
- Arbitrage_ctr is the ratio of clicks to impressions. It can be calculated using the following formula: clicks/shows. The indicator is irrelevant for promotional materials such as directlink and pop ads. The exception is the use of the HTML pre-landing page. The platform shows CTR in fractions of a percent. For example, 0.4 or 1.4.
- Arbitrage_cr is the conversion rate. It can be calculated using the following formula: conversions/shows. It applies only to integrated advertisers. The platform shows “Tracked_roi” in fractions of a percent. For example, 0.4 or 1.4.
- Arbitrage_inecpm is an effective cost per mille. It can be calculated using the following formula: payin / shows / 1000.
- Arbitrage_fillrate is the ratio of the number of promotions on a showcase to the number of showcase displays.
Conditions for working with direct and arbitrage traffic
Values represent the sum of direct and arbitrage traffic.
- Full_paid is the total cost of traffic (arbitrage+ direct ad impressions).
- Full_received is the amount the advertiser sends in postback for CPM campaigns. You need to send the total conversion income to the postback. This is the advertiser’s earnings from visitors attracted by you.
- Full_profit is the difference between payout and payin.
- Full_roi is the return on investment ratio. It can be calculated using the following formula (payin — payout) / payout. The platform shows ROI in fractions of a percent. For example, 0.4 or 1.4.
- Full_conversions is the number of conversions. You’ll see data if the advertiser is integrated and passes conversions.
- Full_cr is the conversion rate. It can be calculated using the following formula: conversions/shows. It applies only to integrated advertisers. The platform shows “Tracked_roi” in fractions of a percent. For example, 0.4 or 1.4.
- Full_inecpm is an effective cost per mille. It can be calculated using the following formula: payin / shows / 1000.
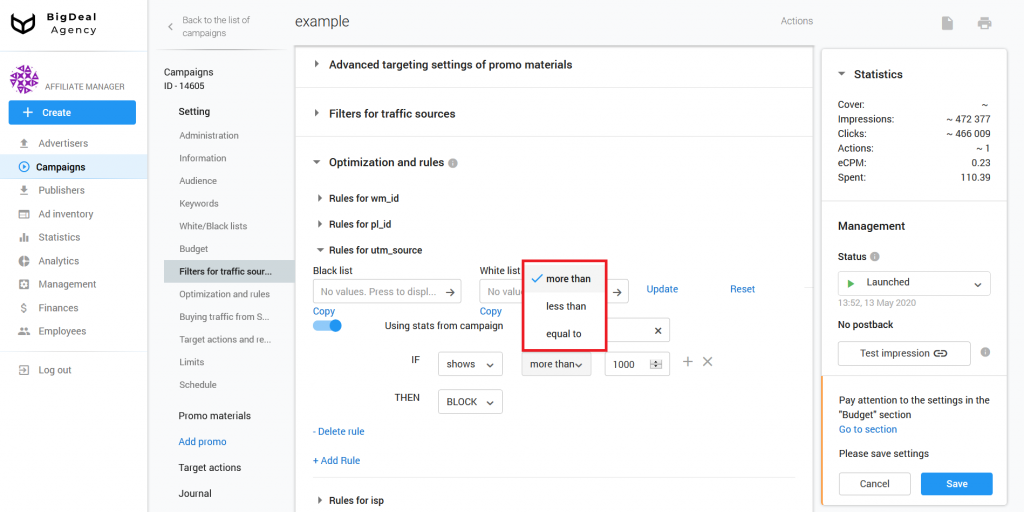
Select one of the options in the following drop-down list:
- more than,
- less than,
- equal to.
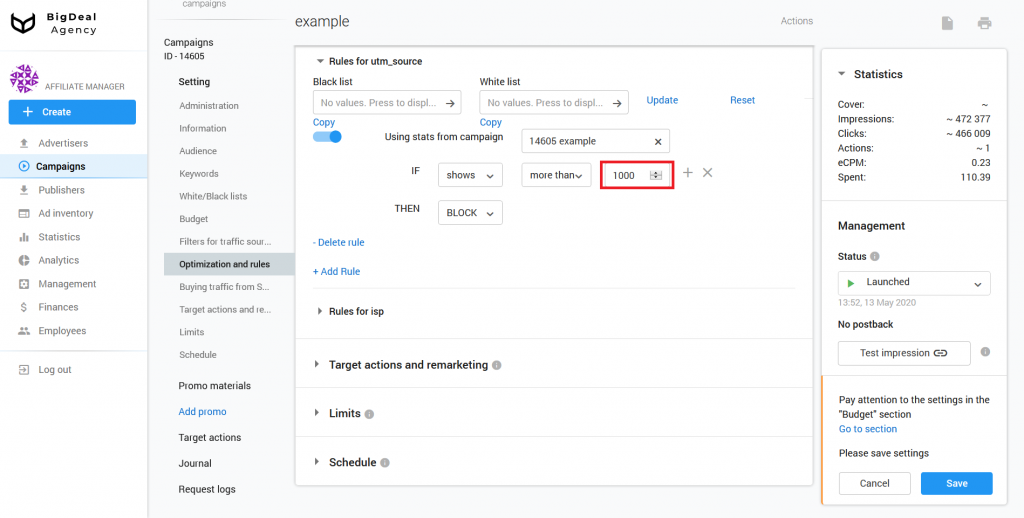
Specify the number that will complete the creation of rule in the third column.
Please note: if you type a fractional number for impressions or conversions, it will be rounded to the nearest whole number, because conversions and impressions may not match these numbers.
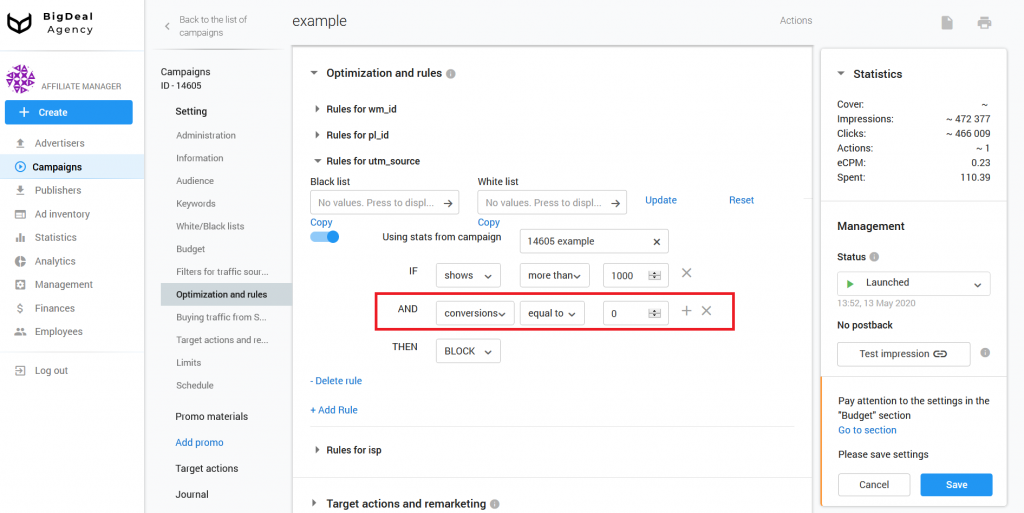
You can add additional conditions to the configured rule. To do this, use the logical AND operator by clicking on the + button. It is located at the end of the IF line.
The second condition is created by analogy with the main rule. For example, you can block those UTM Sources using AND, which made 1000 impressions and did not bring any conversions.
If the generated rule is true for the source, the result will be THEN. You can add a source to the Blacklist using the BLOCK setting. Or you can add it to the Whitelist using the ALLOW setting.
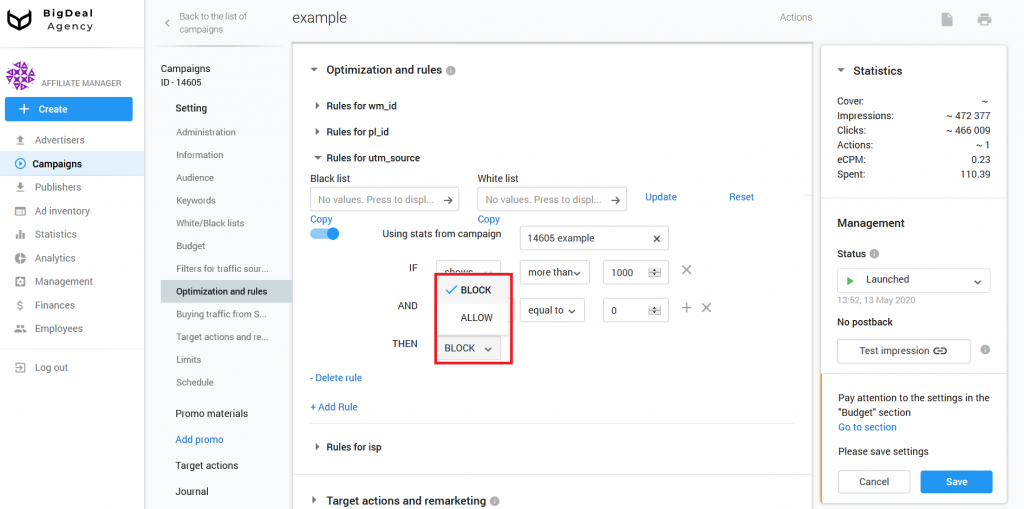
Please note: do not configure the rules with the addition of utm_source, wm_id, or pl_id in the Whitelist without using the Using stat from campaign field. For example, if you created the rule add to the Whitelist all UTM Source, the number of impressions of which is more than 1000 and the number of conversions is more than 0, the first match by the condition will appear in the Whitelist. Further, traffic will stop coming from the rest of the UTM Source, because there will be only one source in the Whitelist. Other sources will be banned from sending traffic to the campaign.
The platform allows you to create multiple rules within one type of traffic source. You can do this using the link + Add a new rule.
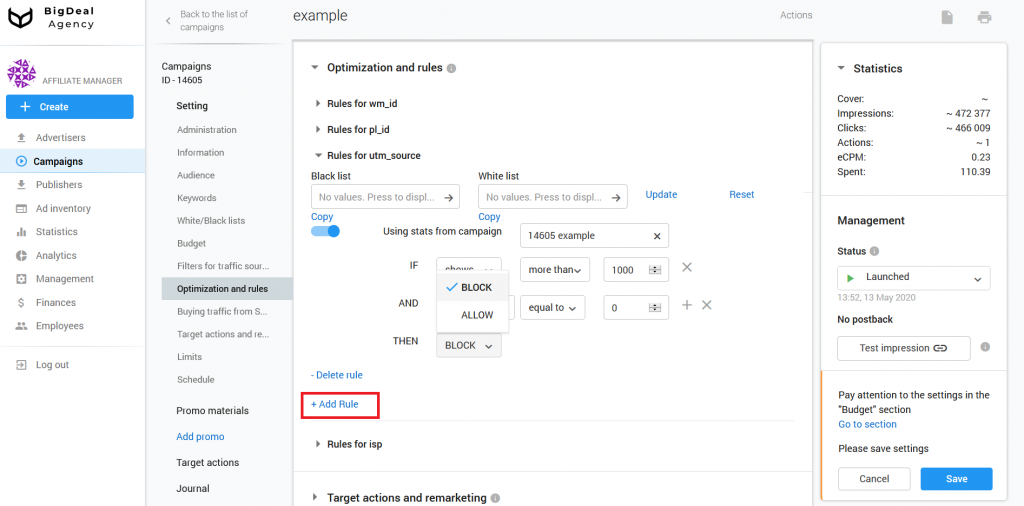
When there is more than one rule, they are combined by the logical OR operator. In this case, the platform checks the UTM Source for compliance with several requirements. If one of the rules is true, the UTM Source will be added to the White/Blacklist according to the setting.
Please note: rules may conflict, so be careful when you create a large number of rules with different conditions. The campaign with such conflicts will not receive traffic.
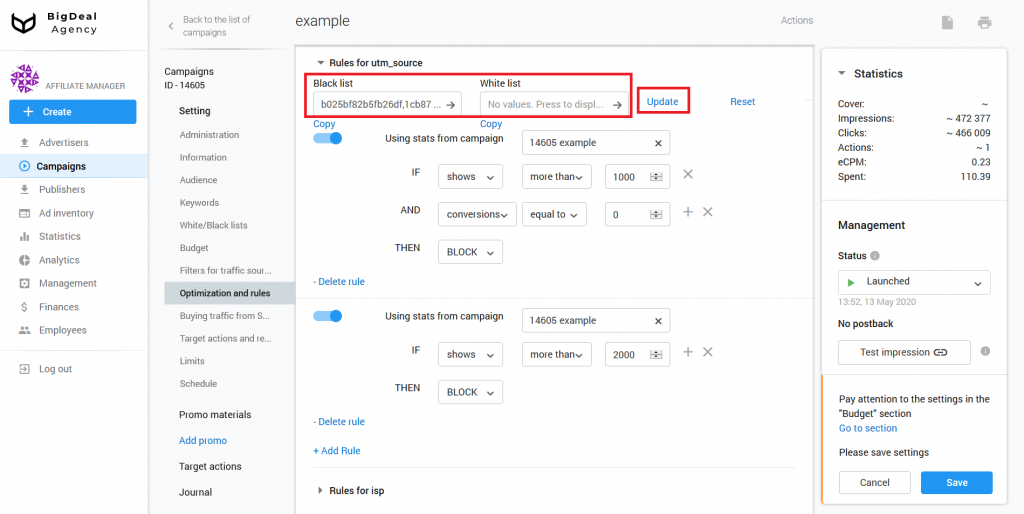
As soon as you configure the rules, click on the Update button. If one of the requirement conditions is met, the platform will add sources to the Black/Whitelist.
Example of setup a Whitelist using rules #
For example, you are in charge of a campaign. Your task is to select the UTM Source that brought the conversions and create another campaign for them with new promotional material.
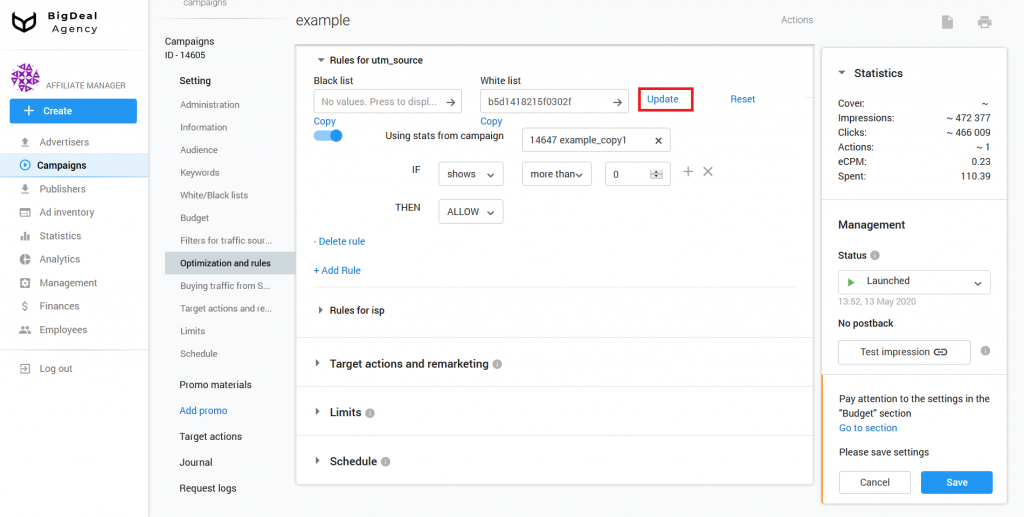
First, create a new campaign and promo material. More information you can find in the article Creation of CPA Campaign. Go to the Rules for utm_source field in the campaign settings of the Optimization and Rules section.
Click on the + Add rule link. Specify the ID of another campaign in the Using stat from campaign field. It will be used as a UTM Source donor that brings conversions. For example, let’s take the campaign with ID 14647.
Set conversions, more than and 0 in the condition. Select ALLOW in the THEN drop-down list. The platform will add to the Whitelist any UTM Source with more than 0 conversions.
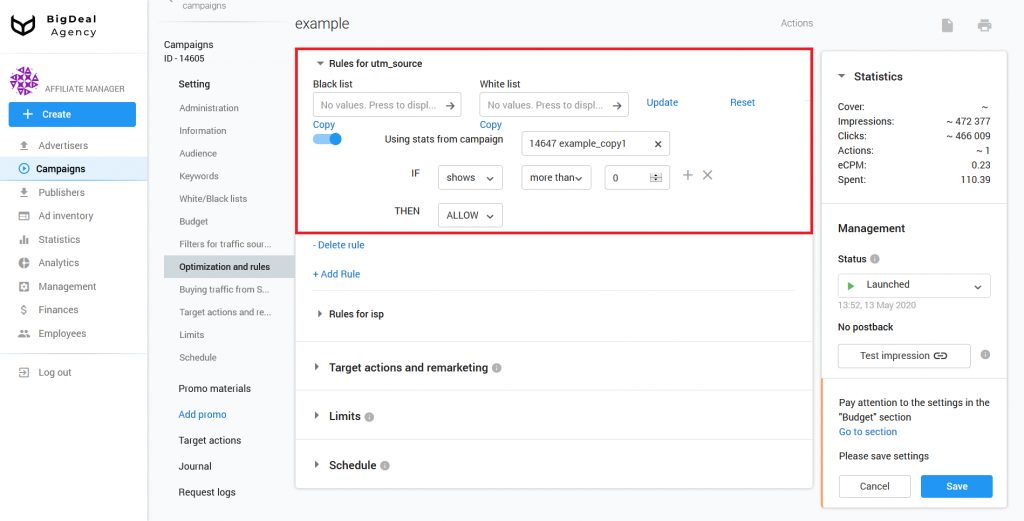
Click Update. A list of UTM Source matching the rule appears in the Whitelist field.
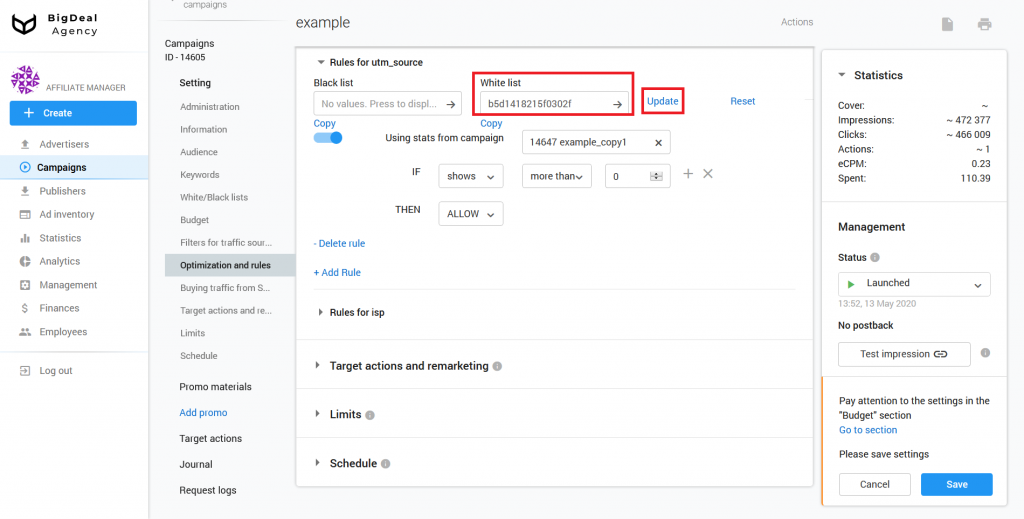
The Whitelist line will be automatically updated with new UTM Sources once per hour. You can also update it manually using the Update and Save buttons.
Please note: if you don’t save the campaign, the platform will not update the Black/Whitelists, and the changes will not take effect.
Let’s summarize the material:
- If there is a large number of traffic sources, the analysis and optimization of the campaign occur with the use of the Optimization and Rules tool.
- You can create requirements for three types of traffic sources wm_id, pl_id, and utm_source in the Optimization and rules block.
- The platform allows you to create multiple conditions within one rule.
- It also supports the creation of more than one rule within a particular type of traffic source.
