Highlights #
Create a promotional material to launch a saved campaign.
After setting up the campaign, the system will transfer you to the new Promo section. You need to fill out this section because here you can add the Target URL, to which traffic will go.
A banner is a small graphic ad unit. It can be static or animated.
Block Information #
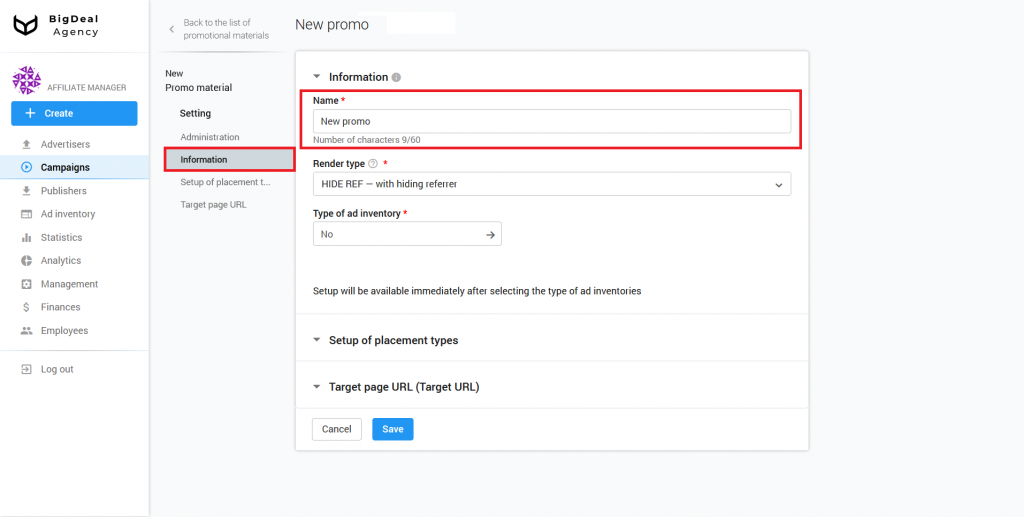
First, name a promo material. You can copy it from the offer name.
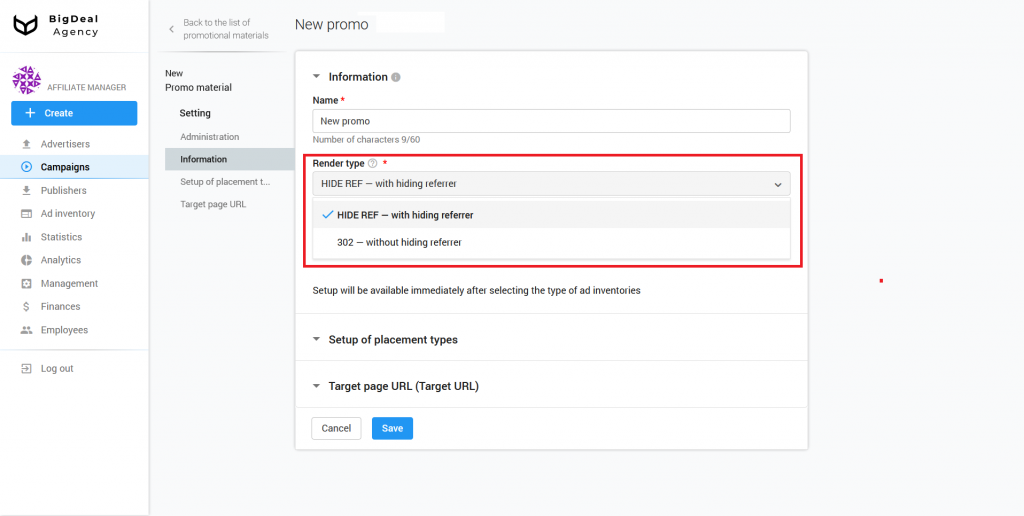
Select one of the methods to open promotional materials from the Render Type drop-down list:
- HIDE REF — with hiding referer. The address of the page from which the user came is hidden. We recommend using this setting in most cases.
- 302 — without hiding HTTP referer. Promo opens via Traffic Delivery System. This option is required when the advertiser wants to get an HTTP referer.
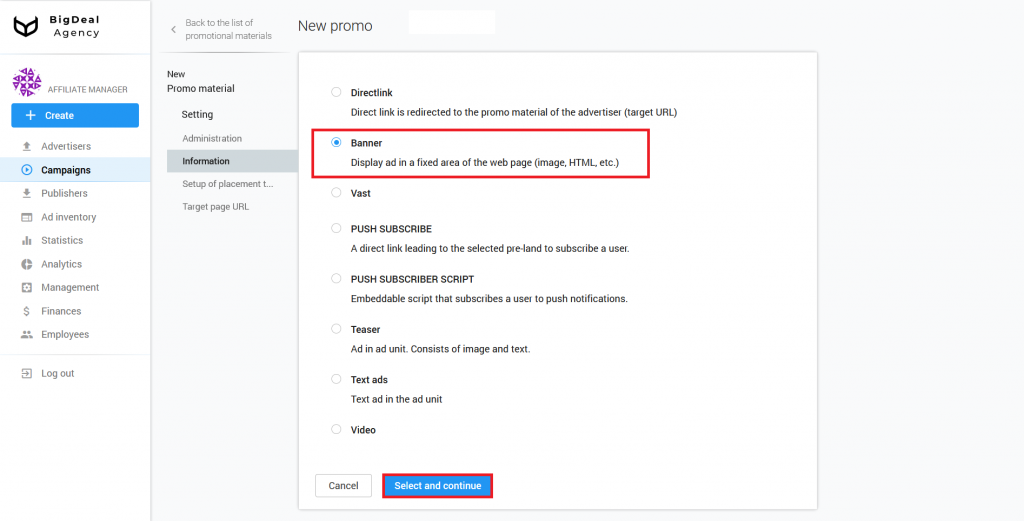
Select Banner the Type of ad inventory drop-down list and save settings.
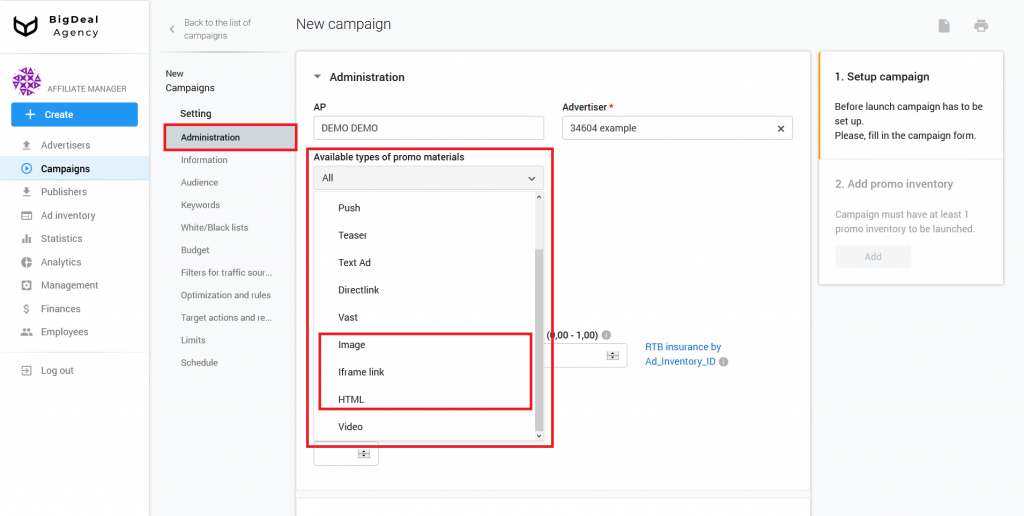
Please note: the list of ad inventories depends on campaign settings. If the appropriate type of promo is not available, make sure you select the Image, Iframe link, HTML, or All option on the campaign page.
When you set up a banner, you can select the type of loading of promotional material. To do this, tick a chosen tab.
Image tab #
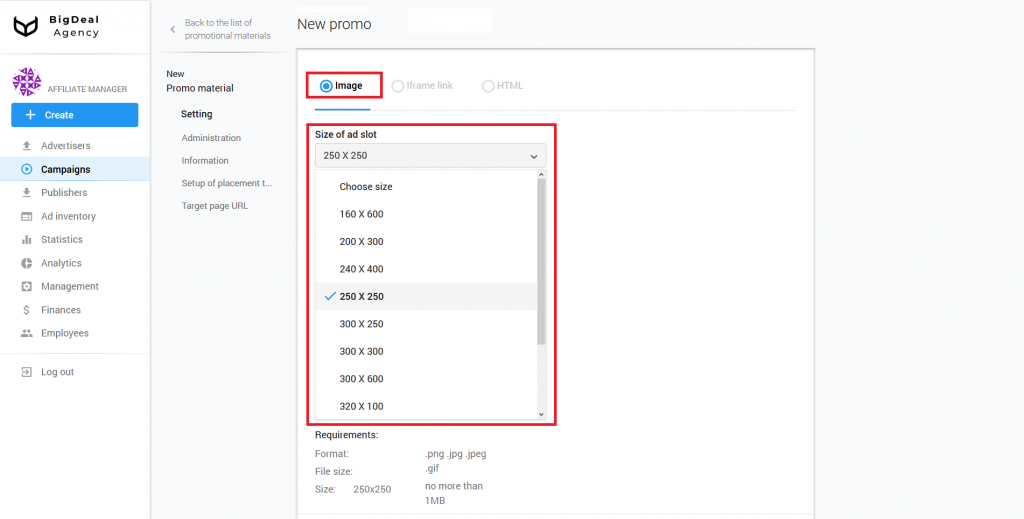
The Image tab is responsible for creating a static or animated image.
Сhoose the size of the banner that will be used during an ad impression from the list Size of ad slot.
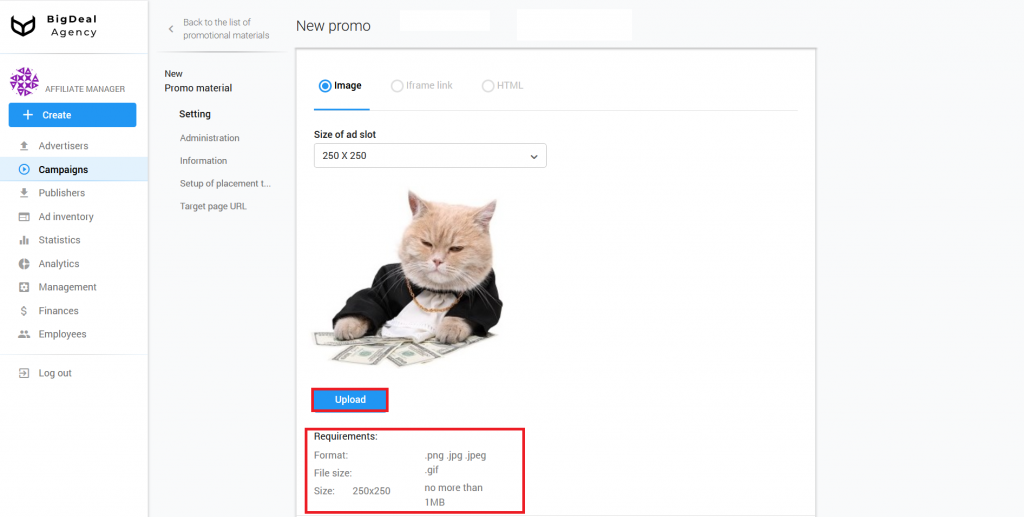
Click Upload to add the image. First, make sure that the banner meets the requirements of the platform.
Iframe link tab #
Iframe link allows you to specify the link of the page on which the advertiser’s banner is placed. The platform uses the <iframe> tag to display promotional material.
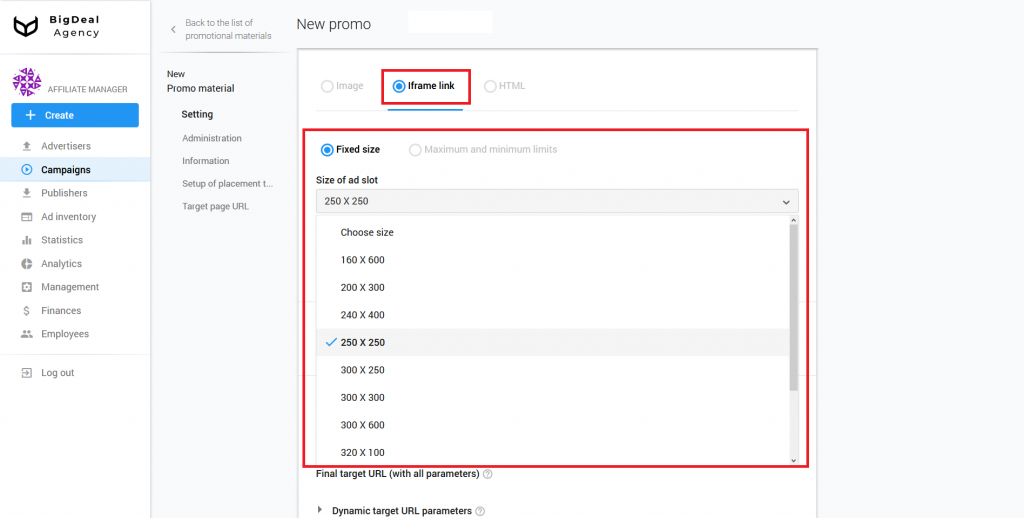
Select one of the ad size types to set up the Iframe link.
- Fixed size
You choose the exact size of the iFrame in which the advertiser’s banner will be opened.
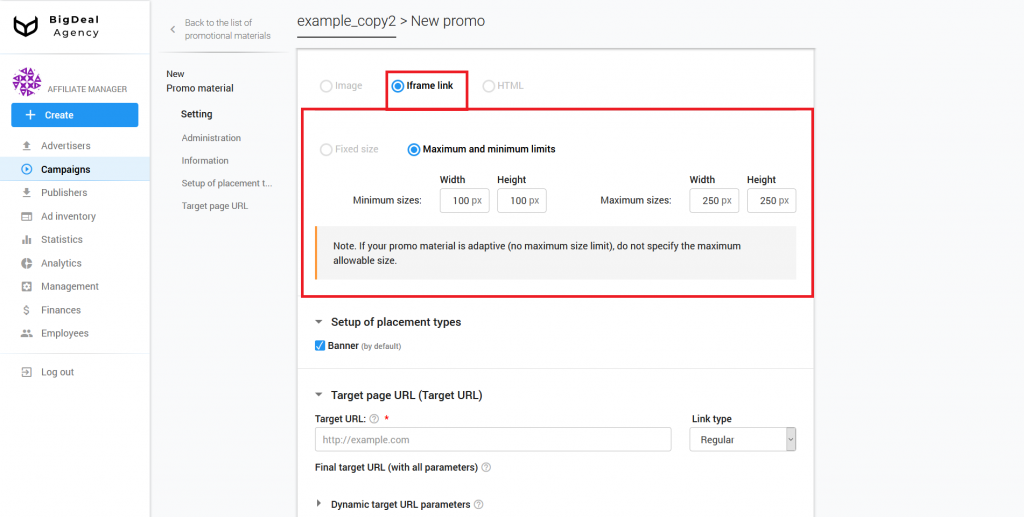
- Maximum and minimum limits
You set the maximum and minimum sizes of the iFrame in which the advertiser’s banner will be opened.
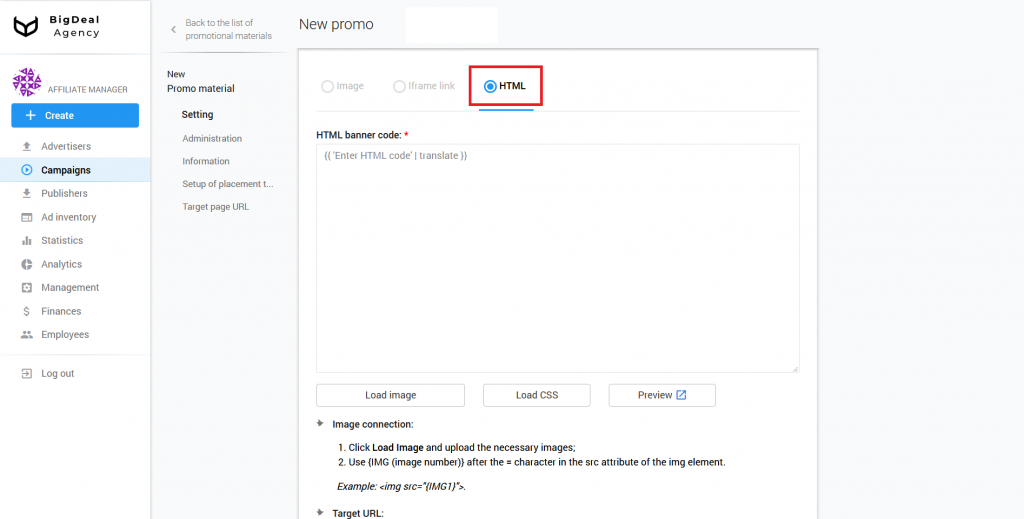
HTML tab #
You can also use the HTML banner for the campaign. An HTML banner is an interactive element that contains multiple images, animation, or HTML code. The banner can reproduce behavior scenarios, and redirect to the pages of the site depending on which area of the screen the user clicked on.
Setup the HTML banner is similar to setup the HTML pre-landing page. You can read more about it in a separate article (coming soon).
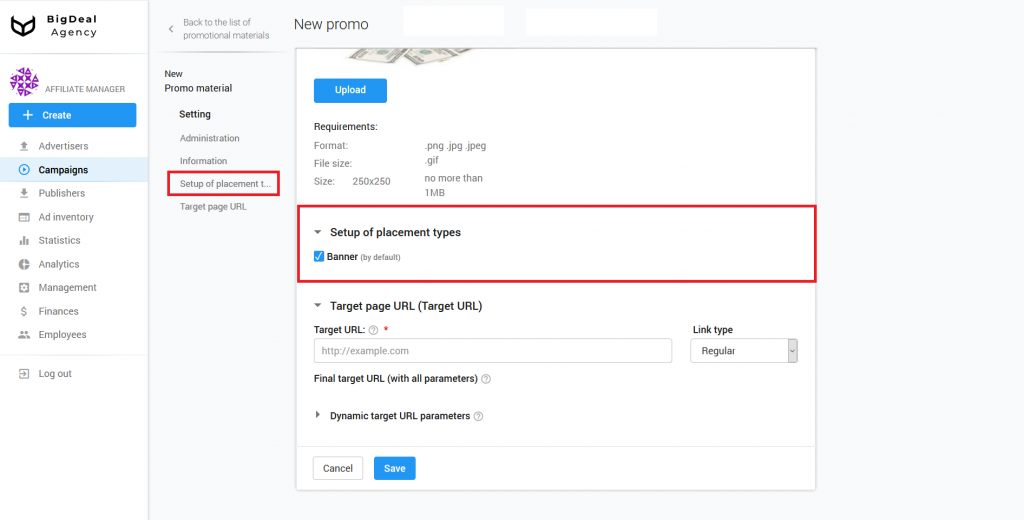
Block Setup of placement types #
The setting of placement types depends on the chosen type of inventory. The inventory or method of promo display in an advertising driver, in turn, depends on the placement types. Placement types are set in accordance with the type of advertising material.
In this case, only the Banner type is available on the platform. Salematics selects it by default.
Please note: when you select an ad inventory and a method of loading promotional material, some types of placement will be unavailable.
Block Target page URL #
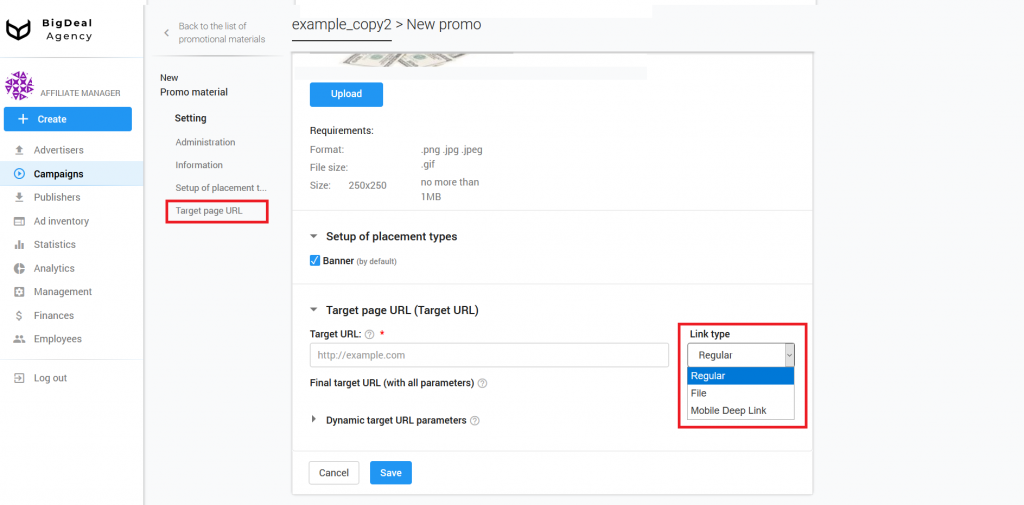
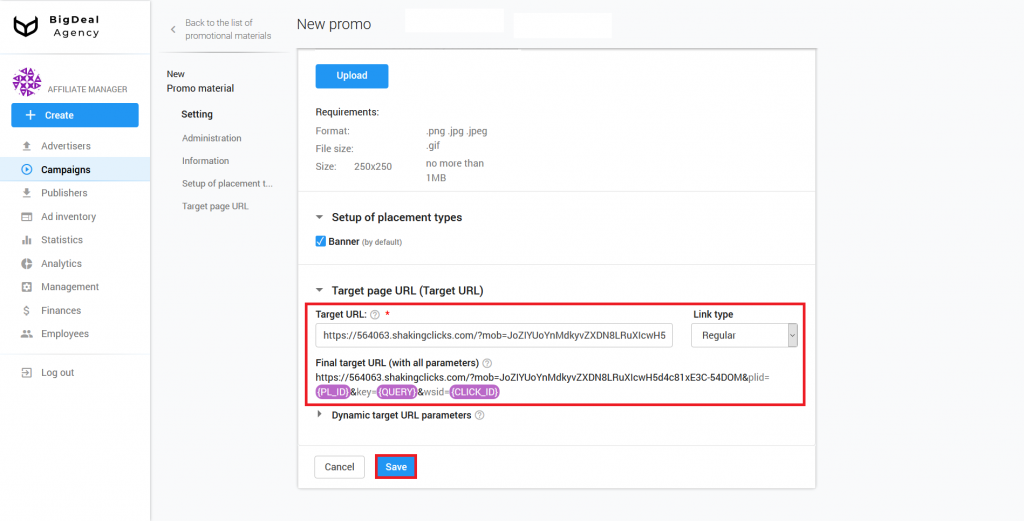
In the last block, you must specify the link to the landing page of the resource. The user will be directed to it from the advertisement. You can select a link type for the Target URL:
- Regular. A link leads to a simple page (landing page). It might look like this:
https://www.viber.com/download-android-update/. - File. The link redirects the user directly to the document for downloading. This type is useful when the advertiser does not have a landing page. For example, when a user clicks on directlink, he will immediately begin to download the file:
https://download.viber.com/apk/ViberAndroid-9.6.5.5.apk. An advertiser can use the HTML pre-landing page for similar purposes. - Mobile Deep Link allows you to specify a link to a section of the mobile application. When a visitor clicks on the link, he will go to the part of the application with a specific section or product card. For example, a link
tg://resolve/?domain=trickortwill direct the user to the appropriate Telegram messenger group.
The Target URL has dynamic parameters. Parameters pass information about the user to the advertiser. Based on them, the system selects promotional material.
Add dynamic parameters according to the instructions in tooltips. The list of these parameters is under the field with the same name.
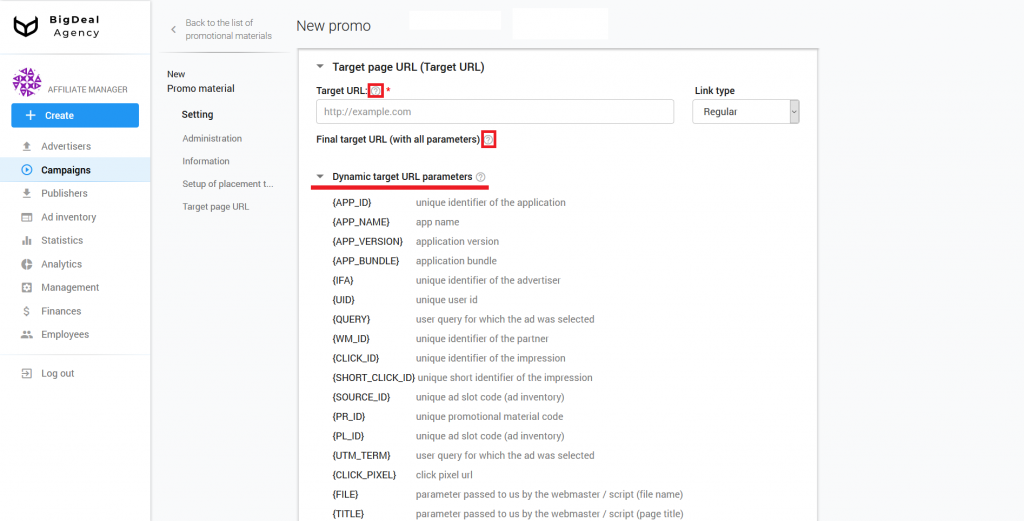
Now copy the target address from the advertiser’s page. Insert URL in the appropriate field on the platform. Make sure that the link does not contain parameters that the platform doesn’t support. Some options may not work with a postback. Click Save.
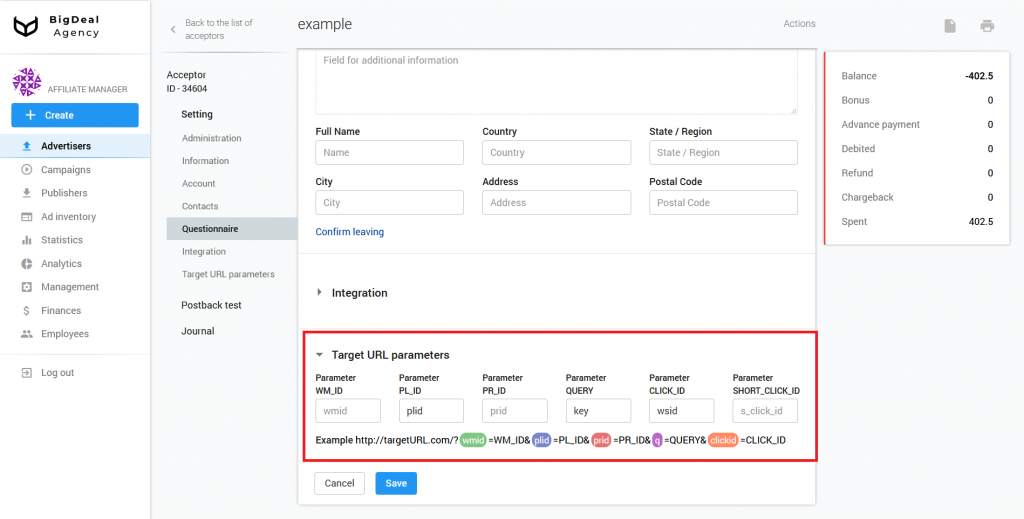
Please note: if the advertiser’s account settings contain Target URL parameters, they will be automatically substituted into the Target URL. Make sure that you do not duplicate the parameters from the advertiser’s account during the Target URL setup. Otherwise, this will cause errors. Read more about this in the article Integrate MANAGED advertiser via postback.
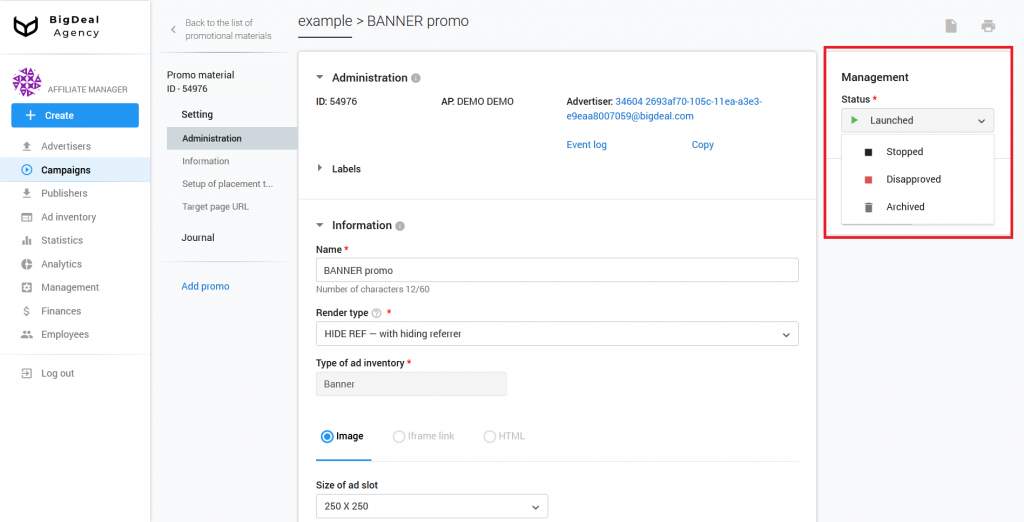
Change the status of the promotional material from Draft to Launched in the appeared Management block.
To find out about conversions, you need to set up a postback on the advertiser’s page. More information about this process you can find in a separate article.
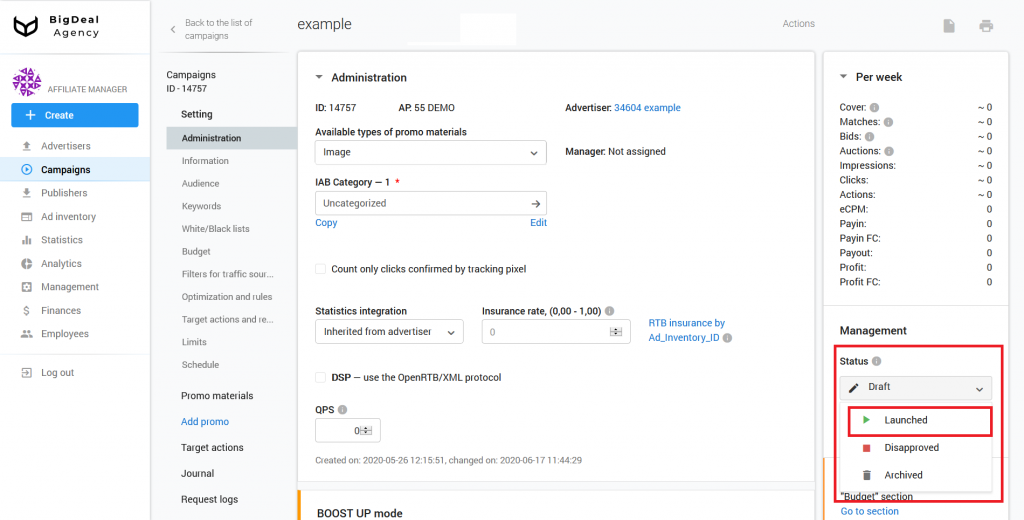
Return to the campaign settings page and change its status. After that, the campaign will be fully launched.
Let’s summarize the material:
- You need to set up promotional material to launch a saved campaign.
- Target URL is an important part of creating a promo. This link will receive traffic.
- It is important to change the status of the campaign and the advertisement to start their work.
- After creating the promotional material, you can set up postback, which will let you know about the conversions.